|
Trail Spinning
Instructions, ideas and pattern information on making your own Bicycle Saddle Bags (saddlebags) and/or Bicycle Panniers with photos are below. We also have ideas and information with photos of How To Recycle, Reuse, or call it Customize a Bicycle Trailer. Our Trailer was made into a Bicycle Trailer. To see the information, ideas and photos, just scroll down. There are many ideas below you might like to see, like adding a Ice Cream Machine or Butter Machine on your bike that makes the food items as your ride your bike below.
The difference between Bicycle Saddle Bags and Bicycle Panniers is that Saddle Bags are all one piece with two Panniers sewed to a yoke. And although Panniers, pronounced PAN-i-eers, are the bags that hold the stuff you carry, most people call Individual Panniers, just Panniers...because that is what they are.
ALSO SEE OUR NEW THE MICKELSON TRAIL BY BICYCLE PAGE HERE ON THIS SITE TOO. WE ENJOY THE MICKELSON TRAIL SO MUCH, WE GAVE IT IT'S OWN PAGE HERE.
The Spring of 2014, and for my 57th Birthday, Deron bought us each a 29" Mountain Bike. Life is short. Deron and I used to, years ago, do a LOT of Bicycle Touring. We might not go as far or as fast (me that is) but it is time to get back out there, enjoy the trails, and shed a few pounds doing it! Bless Deron's Heart, he bought me a PINK Bike too.
A person does not have to go far or fast to peddle for their health. Not only does a bike get a person out into the Fresh Air, it will get your heart pumping and build up their legs. Many people have knee and hip as well as foot problems. It might surprise you to know that Drs. recommend riding a bicycle to build up the muscles for less pain in knees and hips. Riding a bike is wonderful exercise and if you ride those calories off, it is less weight on ALL of your bones and joints and will certainly help your heath.
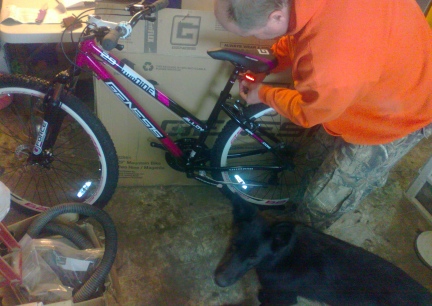
Deron's bicylce was built when we bought it, Deron ordered mine on line and put it together for me.
The bicycles we bought, this time, are not top of the line. Those, ours that is, are still in WI waiting for us to go and get them. They were left in a Storage Shed when we moved to NW SD. We looked at all the options of buying a nice bike, for our tall frames, and bought GENESIS 29" MOUNTAIN BIKES.
Later, when I was starting to add Bike Bags I thought I better check the weight limit on the bikes. 350 pounds.....I am good to pack all I want to take....IF I can peddle it and myself and the hills.
2015 UPDATE: Not only did Deron build my Genisis Mt. Bicycle but also my Gravity Bullseye Monster FATTY as well as his own Motobecane 529HT Hybrid. He has a nice collection (again) of Bicycle Tools.
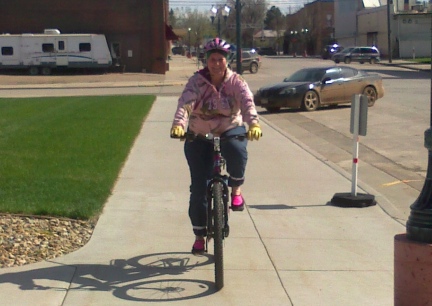
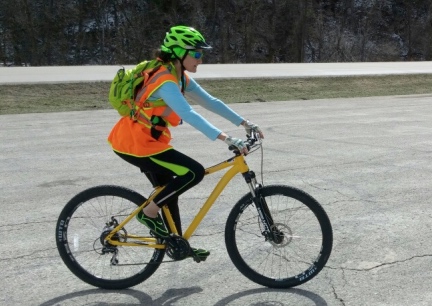
I WENT FROM THIS TO THIS....IN 1 1/2 YEARS
Bicycle AND Equipment Fit
Equipment Fit is important and just like Hiking Boots being a half size to big, so that two pairs of socks and foot swelling is accommodated, Bicycle Equipment needs to fit correctly too.
There is such a thing as Bicycle Fit. You do not want to ride a bike to big for you or one too small for your body frame. Too small a bike with short peddle cranks can be so hard and tiring on your legs and knees. For me? I would rather ride a bike a little too big than a little to small. If you do not know how to size a bicycle or what size you need, visit a Bicycle Shop. They are happy to help you.
While you are there, ask them about Helmet Fit. Helmets do more than cushion your fall....they let your head slide if it hits the ground/pavement/rocks. Without a helmet your head has a tendency to just stop when it hits the ground, this causes neck and back injuries.
At minimum you will need a Helmet and Bicycle Gloves. Gloves are not just to protect your hands in a fall. They cushion your grip, keep circulation of blood flow, so that your hands do not fall asleep or become numb as you ride. The general public tends to respect bicycle riders more when they have a helmet on, giving them more leeway on highways and byways, or a lift to town when their bikes broke down or in bad weather. I know, weird, but proven true.
Bicycle Clothing also has a purpose, not just to look KOOOOL either. Jeans have about six layers of fabric that all meet right where you sit on a bike, making the ride, let's call it uncomfortable. Bike Shorts are padded with no seams in the area that is the most sensitive. If you wear long pants, rather than Bike Pants, be sure to have Leg Straps around the bottom of your pants so that the fabric does not get caught in your chain or get caught on the other side, throwing you off the bicycle like a bucking horse might.
Proper equipment will get you out and keep you out on the trails much longer than equipment that is just torture to use.
Just A Blog
I thought I might just Blog about our Bikes and Adventures here. It might encourage others to get out and ride a bike. It is great excersize and will get you in better shape for Horse Back Riding and Equine Driving.
As you can see from the photo, I have weight to loose. I had lost it and as the cycle goes, and I hate it, I tend to gain and gain fast when I am not eating hardly anything and not working out....
Spinning Trails and Tales
Between January and the last day in April Deron and I had 261.713 miles ridden on our bicycles. It was time for Deron to purchase a nicer bicycle. That in itself is a long story I will not take the time to type up. However. Deron did buy and Nicer Bicycle off the Internet. Of course as our luck would have it the bicycle would arrive after and during a lot of rain....and our prairie gets wet. We can not drive the vehicles across it, and many times, when it is bad, not even the ATV. But our mail was stolen out of our remote mailbox in late April so leaving the bicycle out there was not an option.
Just Getting Started Again After All Those Years Off Bicycles 
Deron and I get stuck out here on the Prairie when it rains or when the snow is melting. 2014 we sure seem to have a lot of WET! So long rides, right now that is, June 2014, are out of the question. Before the long trips, I need to build up to them. But when we go to town, and are not taking the water trailer <see www.faroutliving.com we haul all of our water in> we take our bicycles on the trailer hitch attached bike hauler. We try to ride short rides on the Belle Fourche, SD bike trails, pavement. We increase the length of the rides with each we take. Getting our hearts pumping and enjoying the ride.
2015 UPDATE: Deron and I now ride several days a week. Deron and I have both muscled up, lost weight and have noticed how much healthier we are. We are riding further, longer, and faster. We try to encourage other people to not only ride with us, but to get out and ride their bikes for the fun and fitness!
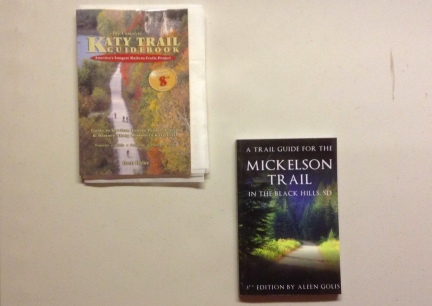
Deron and I have ridden 100's if not 1000's of miles when we were living in St. Louis county, MO. I rode the Katy Trail end to end, as well as spending a lot of time on it for shorter, and many group rides. So when we bought our bikes here, I went on line and found the book for the Mickelson Trail. It might not have everything in it that the Katy Trail book does, but still very helpful with camping and dining areas withing the towns, and mileage between them.
2015 Update: Deron and I have taken several rides on the Mickelson Trail and not only plan to ride it End to End, but to take many many rides on the Trail in days to come.
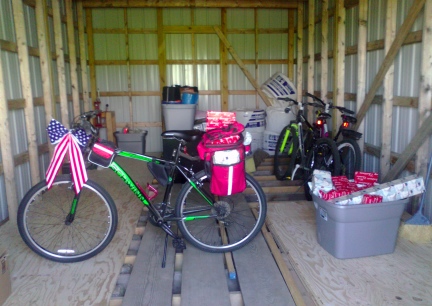
Deron's son, in 2014 now 18 years old, comes to stay the Summer with us each year. This year, as part of his Christmas Gifts, we bought him a 26" Schwinn Mountain Bike with all the bags and panniers, tools, clothes and such he will need to do a bit of Bike Camping/Touring with us.
His favorite color is RED, we fully intended on buying him a red or black bake to match all the bags and equipment I had bought for him....all winter and spring. We could not find a nicer bike then this green one in the photo. So Green it was. Better a nicer bike than the color you want.
6/10/2014
Deron Blake and I rode about 3 1/2 miles around Belle Fourche, SD, Center of the Nation. We started at the Museum and rode the long way to the Gun Shop and back the long way to the Suburban.
This is certainly not the first trip around town on our bikes, but the hills seemed to be steeper. Seriously. Since I have not ridden in a while (rain, and more rain last night and today) it was a bit harder for me. BUT! It was a LOT of fun.
Today I am designing my Bike Panniers for Bike Touring (short rides, like 16 miles and less) for right now any way. I also am planning/mapping out a trip to ND to see the White Buffalo in Jamestown. We will take our bikes with us there too, even if we only do a short bike ride.
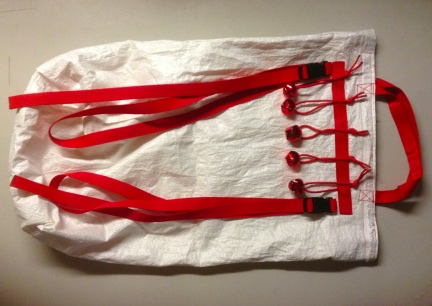
6/11/2014 Hanging Food Holder with Bells
We are going to be taking Backpacking as well as Bicycle Touring Camping Trips this year, and we hope to continue. We bought a LOT of cycle/backpacking/camping equipment, but did not really have something to hang our food in a tree with. So I took two feed bags, put one inside the other, sewed the corners to make the square, that is I sewed them sideways to make like a tote bag. Then I added handles, put a large velcro strip from one side of the inside at the opening to the other for tight closing. I cut and added adjustable buckles for compression straps so that it can be tightened down when not full and also shortened in size. Then I added a webbing strip with places left not sewn for putting sleigh bells on with parachute cord. I used five. Is it Bear Proof? What is? No. But it is better than just a tote bag without a closing top hanging by just the handles. Propped up high on a tree branch, it should help keep our food from animals that might come in as we are camping. The bells are not just to try to scare the animals away, they are to wake us so we can get up and scare the animals off/away from our camping area. The feed bag will be easy to clean, I can even throw it in with a load of old towels on cold or warm, and hang it to dry, having it ready for the next camping trip. The photo shows the bag sideways, the bells are up top by the handles, one handle on each side of the opening at the top.
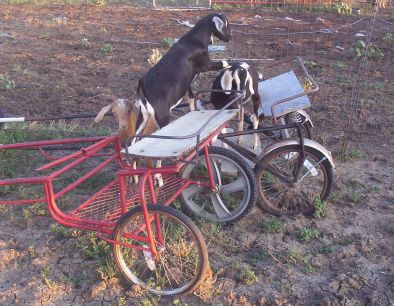
FOOD FOR THOUGHT ~ OR FOOD FOR A WORKOUT!
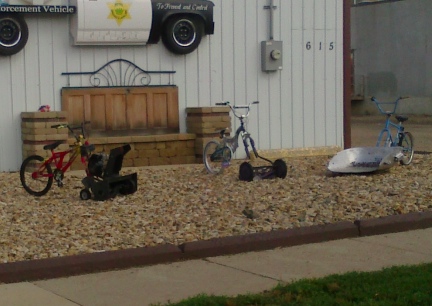
Here's a fun idea! Deron and I, in the Winter, make our own Ice Cream by taking 2 cups of Fresh Goat's Milk...right out of our goats, 1/2 Sugar, Teaspoon of Vanilla. We put those ingredients into a plastic jar and Shake, Shake, Shake. Then we leave it outdoor. We are off grid and do not have a Refrigerator/Freezer. After about 2 hours, we go out and Shake, Shake, Shake that jar of goodies again. Then we leave it set up overnight. Not only is this good to eat, it is healthier than Grocery Store Ice Cream. This Goat's Milk Ice Cream is so rich tasting, you do not eat much at all.
Since this is a Bicycle Blog, notice in the photo that the Carts have Bicycle Tires. Just be careful when using them on equine or dog carts. Make sure you know the weight baring limit of each tire. I just thought I would mention that here, to remind folks to be safe.
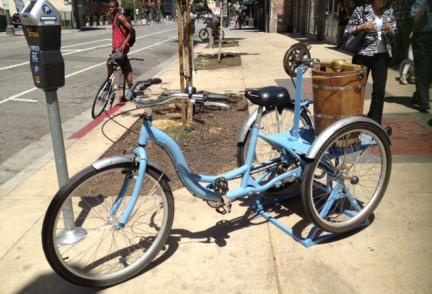 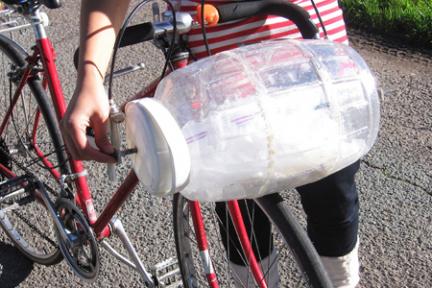
So when I saw these Bicycles that are making Ice Cream as the person or people peddle turning the churn of the Ice Cream Maker....I want one! This could really be fun at a Bar-B-Que. And get folks talking and having a good time with a treat at the end. People like me that need to loose weight, could put in better ingredients and not eat too much, but still have a treat for time on the bike without feeling guilty.
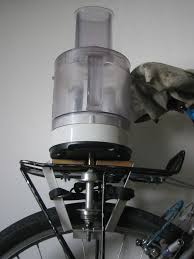
You could take this further and add a blender to your bicycle. Make smoothies as you ride. Add Ice and have a cold treat at your break on the trail.
6-13-2014 MAKING CUSTOM PANNIERS FOR MY BICYCLE
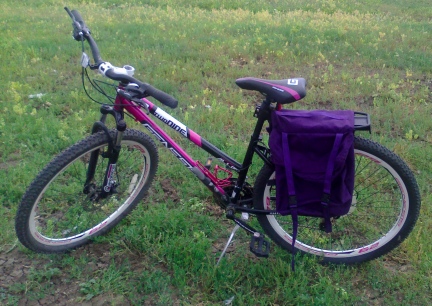
INSTRUCTIONS FOR MAKING YOUR OWN BICYCLE PANNIERS
Materials:
Obviously you need a sewing machine, scissors, thread, measuring tapes and the like.
Nice Water Resistant, thicker, like Cordora or Nylon Fabric, or other fabrics you might find ~ How much should you buy? Depends on the size or your Panniers. Measure your bike, figure out how much you need, then go shopping for your favorite colors, or colors to match your bike....buy a bit more than you think you might need. It is better to have a little extra than not enough.
Webbing for the Handle and or if you want to use it under your velcro where you will attach the Panniers to the Bicycle ~ Webbing can also be sewn unto the outside of your Panniers for an area to tie items down unto.
Webbing and 4 Side Release Buckles for Compression Straps. These will make your trip better and easier when you compress the bags down on long rides. You will need enough webbing to round the entire bag, full sized, and a little extra for sewing on one end and attaching the other end of your buckles.
Velcro ~ At least 2', I use a lot, I also use velcre for the inside pockets I add to the Panniers
Zippers x 2 ~ Size will depend on the size you are making the Panniers ~ BUY NICE ZIPPERS, I like the type that has two pulls so the Panniers can be opened from either size and easily
Patience, Yes. The Panniers are a several hour project. For some the project will take the day or two days. It does not matter....that is, if you do not wait til the last minute before your big ride to make these. Have fun with the sewing project. Don't get stressed over the project, think of how nice it is you are saving all this money making your own Panniers in the colors and sizes you want them in.
WARNING: Don't wait to make these Panniers until the day or night before your Big Ride. You will need to try these, loaded, on short rides to make sure they will work for you and for your Bicycle
Also:
****Panniers need to be loaded evenly, weight wise that is.
****Be sure to take short rides with your new Panniers before you head out on a Multi-Day or Long Rides. That way you will have time to decide on any adjustments you might want to make.
****Be sure to double, I triple or more, every seam on your Pannier set. This way the seams are stronger and will not only hold better, but will last years longer without repairs
****For Fun I cut a Stuffed Dog out of the same fabric (a turquoise nylon) and only stuffed the head and tail. On the stomach, I put a zipper and used the Stuffed Dog as a Bag that sat on top of my Panniers on the Rear Rack. This also makes a great pillow. This time, for my 29" Wheeled bike, I bought a stuffed German Shepherd Dog and cut the stomach area to take the stuffing out. I added Velcro for closing the belly as well as more velcro for attaching to the handle of the Pannier Set, and I will do the same, use it for a bag on top of the Panniers on the Rear Rack for fun.
Hints:
**I learned many years ago that your Panniers do not have to be perfect. No one will see your little errors, once it is loaded and going down the trail.
**When you finish your Panniers, set them somewhere and walk away for a day or two. THEN come back and look at them. All those little mistakes that at first stand out to you, will disappear after a few days and you will be very proud of the Project you finished.
**If you are sewing and get frustrated, walk away and go look at the prices (on line) of the high end Panniers for Bicycles. Then take a deep breath and go back to the sewing machine.
**Seriously. Take your time. The old "Measure Twice, Cut Once" applies to this project too.
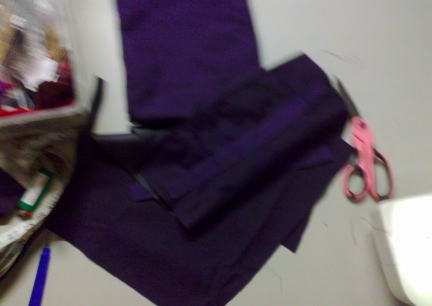
TO KEEP IN MIND:
***Remember, if you are in the Sewing Area Sewing your Bicycle Panniers, you are NOT in the Kitchen Eating or sitting on the Couch Snacking.....this is a Win Win Project!
MAKING YOUR PANNIERS FOR YOUR BICYCLE INSTRUCTIONS OR CALL IT INFORMATION: 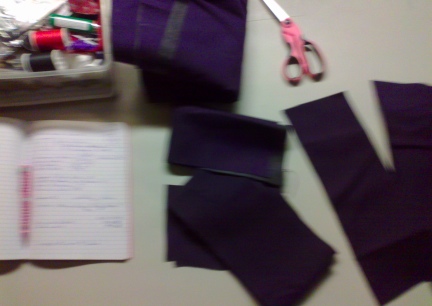
I have made these several times for different sized bikes. Many times it is better to just buy nice Panniers for your Bicycle, but they can be QUIET pricey! The reason I make the ones I use and have made them for other folks. Sorry. I am not offering to make yours. <smiles> But here is how I make, or call it "hand craft" the ones I sew for Touring or Bike Camping.
First you need a Rear Rack for your bike. You need this before making your Panniers or even making the Pattern for them. You will need the measurements from the Bicycle after the Rea Rack is mounted onto the Bike as you will be using it. Yes. This step matters and it matters much.
Take a Tape Measure and Measure your bike from one side of the Center of the Wheel, where the Frame comes together at the wheel that is. Measure either from the top of your Rear Rack and multiply that times two, and add the width of your Rear Rack for the size of your full/under side of your Panniers. OR: Measure from one side of the Center of the Wheel, up over the Rear Rack and back down to the other side where the Center of the Wheel is on the far side. This should give you the same measurement for your bottom side of your Pannier.
Have a piece of paper and pen so you can write down all the measurements as you measure them. Make notes, draw a picture, make sure you know WHAT measurements you are writing down.
Measure your Center of the Wheel on one side of the Bicycle up to the Rear Rack. This will be the size of the Pannier. Now measure the Rear Rack from the seat of your bike back, not including the seat, just the Rear Rack (I mentioned the seat to give you an area to start). This measurement will be the width of your Panniers.
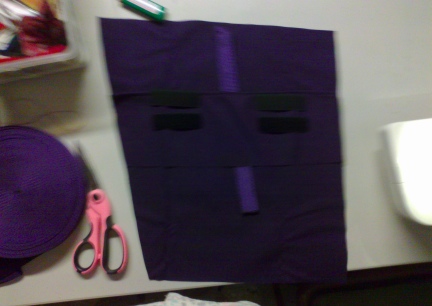
Remember the old "Measure Twice, Cut Once", use that idea for this project.
You can cut your fabric straight or slant back a bit on the front or front and back sides. I have made them both ways. With my 29" Wheel Bike, I slanted the fabric back on the front side. On other bikes, I have not, I left them squared out.
Decide how wide you want your Panniers to be. Cut fabric for your Yoke in all one piece, not in three pieces.
Cut your Top Piece or Lid or Closing Top a bit larger than your Yoke size so that your zippers are covered with a flap.
id= align=right
USE THE INSIDE LINER OF A PAPER FEED BAG OR A PAPER SHOPPING BAG AND CUT A PATTERN, CHECK TO MAKE SURE THAT THIS ALL FITS YOUR BIKE CORRECTLY. BY CUTTING THIS PATTERN, YOU WILL ALSO BE CHECKING ALL YOUR MEASUREMENTS WITH PAPER, RATHER THAN CUTTING YOUR FABRIC POSSIBLY WRONG. I use the inside liner of feed bags for many types of patterns, make the pattern of what it is nd keep it for future use.
To Sew:
****I always double the fabric of my Back Piece. That is the long piece the Panniers will be sewed to. I have and have not, doubled the fabric for the rest of the Panniers Set. This time, using a very nice weight Purple Cordora, I did not double any piece other than the Back, or full piece, that rides next to the bicycle.
****With right sides together, pin and sew your back piece together, leaving an area open for turning right side out, and turn inside right. Using your hands and a pencil in the corners, push the fabric out and flat at all the seams.
****Sew all of your pockets unto the pannier pieces. Decide if you want your pockets on the side of your Panniers next to the bike, or the outside. It is easier to sew your pockets to the flat piece of fabric rather than into the inside of your Panniers. If you are adding Velcor to close your pockets, sew the velcro piece to your Pannier Piece first. Then after sewing the flaps down on the pocket pieces, sew the velcro on it it. Press the velcro pieces together, pin the edges and sew your pocket pieces down to your Panniers. Be creative, sew all the pockets in your Panniers to match what your are carrying. Hide one at the very bottom for cash. Have fun with deciding on your pockets.
****If you are adding Webbing, for tying unto, on or to the outside of your Panniers, sew the webbing on before you sew your Panniers together to the Yoke.
****I sew on my Handle before the Panniers are sewn on. I use the box stitch at both ends. A box stitch is a sewn box shape with an X inside the box. I triple my stitches for strength.
****Sew your Yoke (the width pieces of your Panniers) to the outside Pannier Piece first.
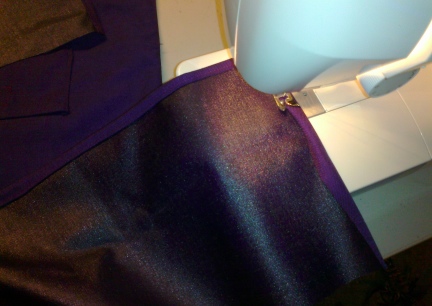
****Sew three sides of your Top Closure Piece or "lid" of your Pannier, turn the fabric under to make a nice looking seam.
****Lay your outside Pannier piece on top of your back side, add your Top Closure Gusset or "lid" of your Pannier. Pin where you want them, make sure you pin the side that will flap down over the Pannier. Pin and check the action before sewing.
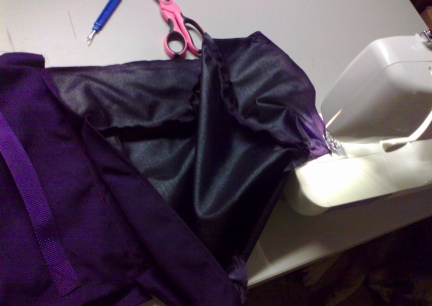
****When sewing your Pannier unto your back piece, sew with the outside facing the back side, look at what your are doing a few times before sewing. You do not sew the front to the back as you would think. Pin it and turn the pocket so that you can make sure you have this right when you turn the Panniers finished.
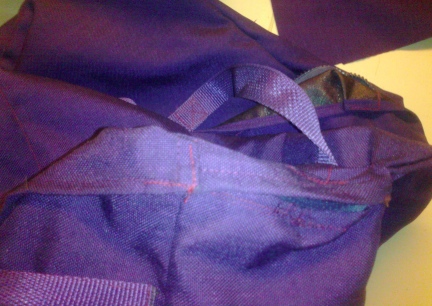 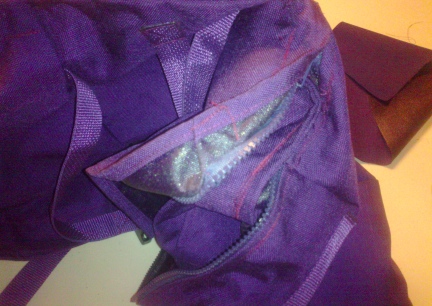
****I sew the tucks of the Top or Lid by hand. I put the zipper in and then at each corner above the top half of the zipper, I turn the lid pieces under to create a fold over the zipper and sew these by hand. By making these adjustments it will hold the top/lid in place on your ride. This will keep rain and or dust out of your Pannier that could be seeping in otherwise.
****When your Panniers are sewn together take them out to your bike and set them on the Rear Rack. With a marker, make a mark on the fabric on the back side next to the bike where your velcro strips should go unto the Panniers to hold them to the bicycle. Measure the circumference of your bars then add about 2" for your Velcro length for tying on. You don't want too short of velcro toughing, or doubled over, to hold your Panniers to your bike. You want a nice tight, well held grip.
****Sew your Zippers in last. After all else is finished.
6-14-2014 I WAS LAYING IN BED LAST NIGHT AND I REMEMBERED.... On the 13th I had to put the project away and move things around, a bad storm was moving in and they were telling folks, on the TV, to get to the safe spot in our homes. We have a tiny house, so it takes some moving of everything for us to get to ours.
I did not get the project back out, but while I was laying in bed and falling asleep I remembered, while not thinking about it, that I had forgotten to add my Compression Straps to the outside of my Panniers. These are almost a must. They not only hold the load tight, they keep the load from moving about in your Panniers while you are moving as well as takes up the slack as you use up items such as food from out of your Pouches on each side. (remember to even out your load again as you use items from out of each side of your Panniers).
I got my project out again, the sewing machine and all and set it up. I cut my webbing to fit the Panniers, with a bit extra inches for the buckles and started putting this all together. Straps like these need to be boxed squared when sewn on and with all the doubling and tripling and more I had been doing for this project, and with only one spool of thread this color....
While I was making my Panniers, I ran out of thread. Dang It! I NEVER run out of threads, I sew for a living, I ALWAYS have at least two spools of thread of all colors. So I put it all away until after the next trip to town.
6-16-2014 ~ It has been a while since I have made Panniers, either for Bicycles or Animals. Boy, have the cost of GOOD Zippers gone up. But worth the money for sure. Nothing would be worse to put all the money and time into a project like this one and have cheap zippers break out on the trail. Thread had gone up about $1 per spool too. Again. Do not scrimp on this sort of project!
101 Other Ideas For Bicycle Panniers
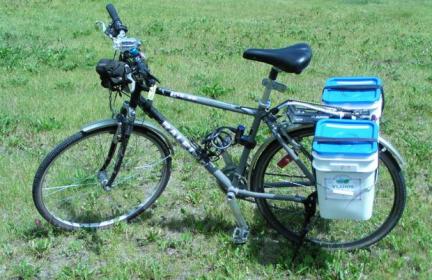
Since people have been riding bikes they have been using carriers attached to them to carry items, like Groceries. Years ago, we had the cutest little girl neighbor who had the cutest little natural colored basket with ribbon and bow on the front of her little bike. In the basket she had a little pillow for her little dog named "Schnops". The dog would get out and get in on command and off they would ride. Very cute.
People have used everything from a Plastic Bag to a Cardboard Box, to expensive fancy, Panniers made by Companies that make all sorts of Bike Accessories. You do not have to spend a lot of money to have nice cargo areas to carry your stuff as you ride your bicycle. There are some GREAT ideas for Baskets, or Panniers out there that are FREE to Cheap to make yourself.
Baskets ~ Either made for bikes or purchased at a Thrift Store, maybe even one your mother is getting ready to throw out in the trash.
Horse or even Pony Saddle Bags ~ You will have to "work them over" to fit the bike and add velcro, but you can use a new set or the old ones you have hanging around in your tack room.
Suitcases ~ If you can find two, light weight, good shape, non stinking, that match at a Thrift Store, you have found GOLD!
Kitty Litter Buckets ~ there are many websites that give the plans and instructions for making these hard sided Panniers. You can also buy Kitty Food in these buckets as well as find them in colors new.
5 Gallon Round Buckets ~ These won't lay as flat to your bicycle as the square buckets, but will work and keep your items from be crushed, that is, if you pack them correctly.
Storage Tubs ~ of different sized and shapes bought from Discount Stores. Chose the shape and size you need for the type of items you will be carrying.
Small Feed Buckets ~ However, you will need to make these some sort of lid, or use them with an Open Top.
Small Backpacks ~ A light weight hiking type Backpack, one on each side to match, could easily be adjusted (add, change and remove straps to adjust to your bicycle racks)
Feed Bags ~ Animal Feed Bags are made out of the most wonderful materials these days. A Plastic Breathable Pannier could easily be made out of two, one for each side of your bicycle. Animal pictures are usually on these bags, adding to the fun of making your Panniers out of these.
Plastic or Corrugated Plastic ~ There is a guy out there that makes Fenders and Panniers out of Political Corrugated Signs.
Duck Taped Cardboard Boxes ~ Choose your colors and have fun covering the box. However, be careful, the duct tape does not make the sides of your box much more hard or stable.
Ammo Can ~ Metal is heavier than plastic, both are waterproof.
Milk Crates ~ Ask before removing these from Store or Restaurant Parking Lots.
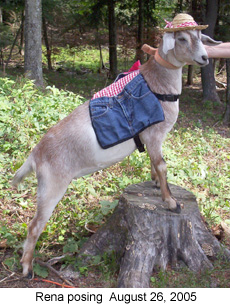
And if you really want to Go Green, use Old Clothing or an Old Tent or an Old Blanket or Old Curtains to make your Panniers out of. I used to make Dog and Goat Backpacks out of a Pair of Jeans, using the front of the pants on one side and the back of the pants on the other. The pockets were used for items carried too.
Other Green Ideas: Empty and Cleaned Paint Buckets, Old Purses, One Gallon Empty and Cleaned Food Cans, Old Computer Cases. I would warn you against using glass items but a One Gallon PLASTIC Jar, could be adapted to make a carrier for your bicycle. Look around your garage or at Garage Sales, Thrift Shops or the Recycle Bin and see what you can find.
Two Large Cooking Pots ~ new or used could be used for Panniers. However, if you were going to use them for cooking in camp, make an outside pouch for each to attach to your bike. That way there will be no holes in your pots. Metal Pots might need to be lined also, or they might make a lot of noise going down the trail.
Two Popcorn Buckets ~ Those large metal popcorn cans with lids. Most have very nice decor on them. Again, you might want to muffle the inside of these to quiet them on the trail.
Two Matching Tote Bags ~ You can buy these with Store Names on them or in prints and colors. They could easily be made into Panniers, add velcro closures across the tops for a way to keep them closed as you ride.
Dog Backpacks, or Goat, Donkey, Yak or Llama, Panniers.
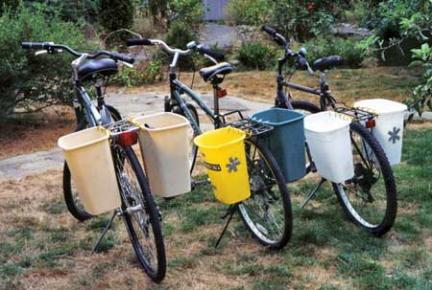
Trash Cans ~ Clean of course, preferably new, small Trash Cans.
If you could get a hold of some, legally, those Plastic Shopping Baskets most stores offer customers to carry and use for items they are purchasing.
Two Lap Top Cases. You can buy these for a couple of bucks at Thrift Stores. And Laptop Cases used as Panniers would be quite handy if you are taking your Laptop with you on your bike rides.
Two of those nice Clear Plastic Cases with zippers that bedding comes in. Call them, Clear Plastic Bedding Zipper Bags.
Two matching Rifle Cases.
Two Hard Cases Guitar Cases.
Cut the top off of a Milk Jug, that is leaving the handle, just cutting the pouring area off. Attach easily to your Rear Rack.
Small Animal Cages.
Light Weight Wooden Boxes.
Wicker Baskets with lids.
Diaper Bags.
Hard Sided Insulated Coolers, smaller of course.
Soft Sided Sided Insulated Coolers.
Stuff Sacks or call them Pouches from Sleeping Bags.
Two Liter Bottles with the top cut off. Use open or make lids for them.
Picnic Baskets.
Small Animal Pet Crates.
Pillow Cases.
Recycling Bins.
Use Vinyl Fabric or Table Cloth Fabric to make Panniers.
First Aid Kit Boxes.
Hard Sided Gun Cases.
Plastic Shoe Box Storage Containers.
Large Sized Empty and Cleaned Drink Mix Plastic Jars.
Those Bags used instead of Wrapping Gifts. I would cover them with clear packing tape to make them sturdier.
Make Up Cases, the large ones of course.
Ice Cream Makers when the cranks and or churns break on them.
Empty Plastic Coffee Cans....for smaller loads.
Large Coffee Thermos....for small thin loads or coffee for the road.
Canoe Trip Dry Bags.
Two Briefcases.
Take a Yoga Mat and some Duct Tape and have a lot of fun putting together a set of panniers. These will be light weight, will let a bit of air threw, come in many colors and would be just plain fun to make!
Small Laundry Baskets.
Insulated Grocery Store Tote Bags. Many Grocery Stores sell toes bags that are insulated used to carry Ice Cream and other cold items home. Two of these could be used for Bike Panniers that would insulate your items as you ride.
Sewing Kits, the large older ones that is, some are baskets, some are hard plastic, could be used and would have areas to separate small items.
Toaster Covers. <winks>
Extra Large Easter Baskets, buy these from Thrift Stores out of season for less than $1 each. Use them open or make a cover for them.
Rabbit Nest Boxes.
Those Bird Houses you make or paint yourself....take the roof off one side and add hinges for the lid. It may not hold a lot, but could be really cute if done correctly.
Post Office Mail Room Light Weight Corrugated Plastic Boxes....IF you can get them legally.
Knit or Crochet a couple of Panniers, but line them with fabric so that items do not fall out as you ride down the trail.
If you can talk the Construction Crews out of it, Used Snow Fencing, with zip ties to hold it together, could make a nice pair of Panniers for the right type of Trail Riding and the right type of load.
Military First Aid Pouches will work for some loads.
Bowling Ball Bags.
Duffel Bags.
Men's Shaving Kit Bags.
Laundry Detergent Buckets. These are being used all over these days. You can find information and instructions on line to make these in several different ways. Check out several ways before you start your project.
Building Compound Mixes Buckets.
Nail Buckets.
Tool Boxes, these lock really well with a pad lock, just remember the extra weight it all will add.
**
When your Panniers are too full, and your sleeping bag is piled too high, buy a Bicycle Trailer and plan more Bike Touring Trips!
EVER HEAR OF A BICYCLE SPRINGER DOG ATTACHMENT?
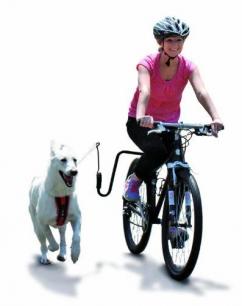
Dogs LOVE to Run and They Love To Go With Us....Ever Heard Of A Bicycle Springer Attachment?
Bicycle Springers are attachments you can attach to your Bike, the arm or long dog spring, comes off and on depending on when you want to use it. Your dog needs to be trained, but the Spring on the Springer keeps the dog from pulling you over and is far safer than just having a leash on your dog as your ride your bike walking or running your dog. Have a look at our "Bicycle Springer ~ Dog Attachment" page here on this site, check at the right in the Navigation Box, near the bottom for more, detailed information.
I wish I had those old photos of me and my dogs out with the Springer Bicycle Attachment. We sure have gone a lot of miles with them. I lost the photos to Black Mold in N WI. I now have my third Springer Bicycle Attachment. Not because they do not last forever, very well made, but because two are still in WI. I am going to train my German Shepherd Dogs to Run Beside Me as I ride my bike this Fall. Great for the dogs, safer out on the trails and in Camp. Nothing like a dog to alarm you of someone or something messing around your stuff in camp.
The contents of this page for Trail Spinning should be under construction as I add to the Blog as we go. Please come back and read often. Thanks! I would also LOVE to add YOUR Bicycle Tales or equipment ideas on this page too. Photos add to the fun. Send them to me at Marna@DoesMyButtLookBigInTheSaddle.com
INDIVIDUAL BICYCLE PANNIERS MADE FROM FEED BAGS
I LOVE reusing Animal Feed Bags. The type they make today are waterproof and large as well as brightly decorated. I will, However, be using plain white Corn Bags. I use these for many things including carrying our dirty laundry to the Laundromat and wet clothes home to hang them. The Corn Bags are waterproof, have a bit, just a little bit of air flow, and hold up for yeeeeears of use.
I made the food bag above and got the Idea that making a set of Panniers out of these would work out great and last for many years to come.
Materials Needed:
I am going to use 4 Poly Woven Corn Bags, I am doubling each side for thicker, more durable Panniers. But if you wanted to, you could just use 2 Corn Bags, or 2 - 4 of another type of Poly Woven empty, clean Animal Food Bags.
Matching or Contrasting Poly or Nylon Webbing <I recommend Poly, easier to sew, lighter weight, holds very well.> How much? That will depend on the size of your feed bags and how you want to put your Compression Straps onto your bags and if you are going to add handles or not.
4 Side Release Buckles
A few feet of Velcro Closure
About 24" of either Bias Tape or Parachute cord to Match your Webbing....or not, this is for making loops, think belt loops, on your Pannier for your Compression Straps to stay in place.
A good attitude and good humor!
Feed Bag Preparation:
The first thing you want to do is turn your Feed Bags inside, make sure to push out each corner all the way out, and shake them ~ do this outdoors. Wash your Feed Bags, still inside out, in cold pr warm water with a load of towels. Hang the Feed Bags to dry for about 24 hours....still inside out.
Sewing:
I am going to set one Feed Bag inside another, that is, double my Feed Bags for longer life. The Corn Bags are not as tightly woven as other Feed Bags.
For my doubled feed bags I will first sew each of the two sets together at the top opening.
Then with the bags still outsides in, sew about a 6" seam at the bottom corners, sideways. Another words, make the bottoms like a Tote Bag. This gives you a gusset without sewing a gusset into the Panniers. Double, Triple sew these seams, all seams, but these will be holding the most stress of the Pannier. DO NOT SEW OVER THE SAME SEAM, MOVE YOUR SEAM OVER JUST A BIT, JUST A LITTLE, CAN'T EVEN REALLY NOTICE IT BIT, or you will be perforating the Feed Bag and these seams will actually tear the bags right there.
Now turn your Pannier inside right.
IF you want to have handles at the top, so you can easily carry your Panniers when they are not on your bike, this is the time to add them to your Feed Bags. The size and angle is up to the user. I like big handles so that if I have on gloves or other items in my hands at the same time, the handles are easy to use. Handles will fold over to the outside of your Panniers when on your bicycle and should be tucked up under the velcro fold over closure so they are not "blowing in the wind" as you ride your bike.
Sew a piece of Velcro to each side of the inside opening, this in lieu of a Zipper, you certainly could use zippers. Now sew a couple of 6" pieces of velcro closure to the outside of one side of the top of your Pannier. This will be the Folding Hold Down.
Hint: This side will be away, or on the outside of your bicycle. Use your HARD SIDES of velcro at the top of your Pannier for the fold over.
Decide how far down you want to fold your Panniers over. You might want to add two SOFT SIDES fold down areas later so that on the trail you can choose how far over to fold your Panniers.
Sew your Soft Sides to the Pannier at those measurements you have chosen.
A person could sew their Compression Straps on a number of ways, here is how I am doing mine on the Feed Bag Panniers. I am cutting my Parachute Cord at about 1 1/2" strips. This way the 1" Webbing will flow through them easily and quickly. If you have thicker webbing, cut your pieces longer.
I measure my Compression Straps by actually wrapping them around the Pannier itself. Then I cut about 4 extra inches, 6 is not too many.
Sew the female side of the Side Release Buckle on to one end of the strap.
Now take that side, the one with the female side of the buckle sewed on and hold that onto your Pannier with the buckle over the top, and the rest running down with the feed bag. Now look at it sitting on the table like that. Place your buckle where you want it to be sewn to your Pannier for use on the trail. Sew it down on the BACK side of the Pannier.
Hint: I like my Compression Straps about 4" - 6" in from the sides, but don't forget about your bottom seams making your Pannier have a gusset.
Now lining your Compression Strap up with the Pannier as you want it to lay, pin or make a small dot where you want each of those, loops, like belt loops, sewn unto your Pannier. Be sure to really nail these loops down, they could be holding a lot of pressure. But remember too, that you do not want to perforate your Pannier, sew the loops with seams moving over just a bit each time.
When in use, tie your extra webbing from your compression straps (after compressed with smaller load) and either loop or tie them down so that they hare not waving in the wind as you ride your bicycle down the trail.
Take this now Pannier out to your Bicycle with a marker and hold it up on your Rear or Front Rack to decide where you want the velcro holders to be place. Sew them on and take it back out to your bike to make sure they fit correctly. If you are pleased, take the Panniers back to the sewing machine and really sew that velcro onto the Panniers. I use a box stitch, it is a sewn box with an X in stitches x3. This is the same as I sew my Dog and Goat Harnesses that pull a LOT of weight.
I added two approx. 2" strips to the top area just below where the velcro is for hanging in trees while out camping with my bicycle. Handles at the top of the Panniers can also be used for tying out/up. This way the food and other items are out of the reach of most, if not all, animals that might want to eat my breakfast while I am sleeping. I will also make a bell knot to add to the bags. Not so much to scare the animals away, although that would be great, but to alert me to the animals messing with the Pannier.
More Blog on Riding Bikes for Exercise and Weight Loss
2014-06-21 The Odometer Must Be Wrong WE WERE ABLE TO GET OUT OF HERE (after all this danged Rain, Rain and more Rain with Storms!) AND GO AND HAVE A GREAT TIME.
WE TOOK OUR BIKES AND RODE AT LEAST A FEW MILES PER DAY, the last four!
Today? Oh My My! It has taken a while, over the on hour drive home and been here a while, to cool back off from just a 2.6 mile ride today.....must have hit a wall because I have been riding further (and faster). It is the First Day of Summer and warmer here too.
Am I loosing weight? Not really.
However, I am feeling much better and my hips and knees and legs and arms and.... are stronger and my endurance is way up (from not too much at all). My Lungs are really doing better and well!
I am down 2 belt holes.
I am loving riding our bikes together, and having a LOT of fun.
I am drinking far more water.
And I am sooooo looking forward to, and I sure hope it is soon, seeing and riding the Mickelson Trail!
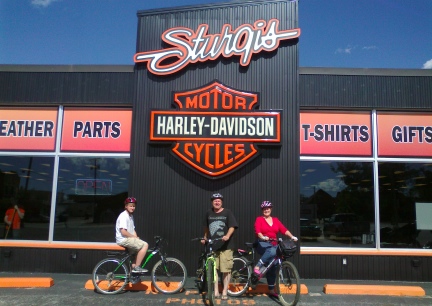 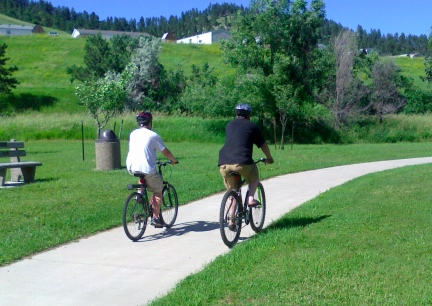 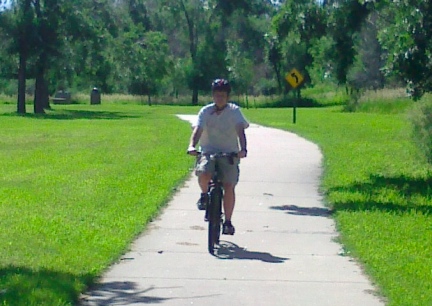 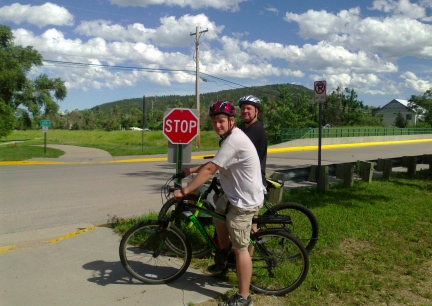 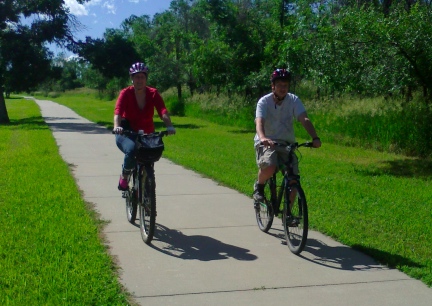 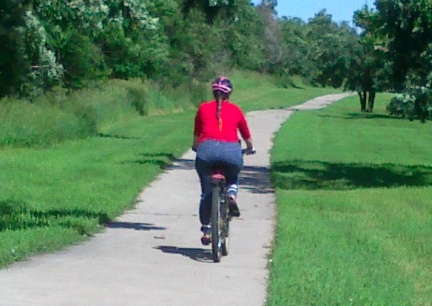
We took our bicycles on Sunday and rode them on the Sturgis Bike (bicycle) Trails (paved) and nice. We rode almost 4 miles, we rode out to a Biker Bar called Loud America and ate there then rode back.....riding back got the best of me in sweaty jeans, I had to fight them as I tried to peddle (and a full stomach) and a slight, almost constant, uphill. Man. It was fun. We FINALLY got some photos of us out on the trail too!
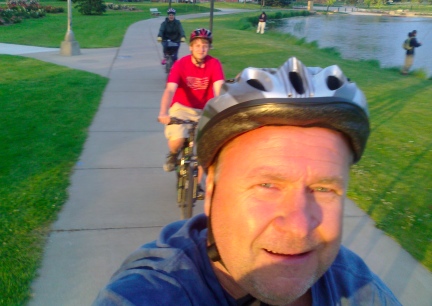 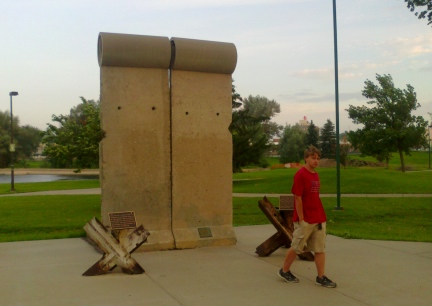 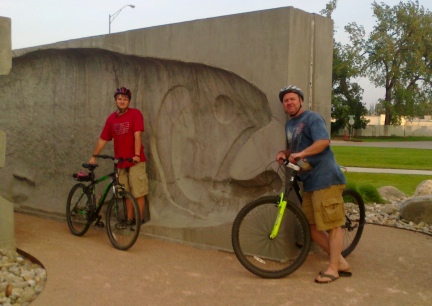 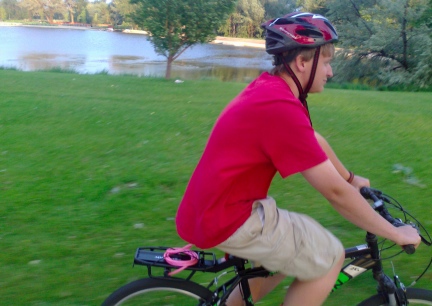 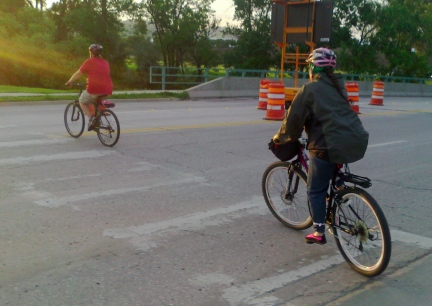
Yesterday we went to Rapid City, just over 2 hours from us and the closest Mall (no, I do not go there, just saying).
We really like the Rapid City Bike Trail. It is paved and meanders, and has pretty creeks, a fishing pond, and fun parks along the way. We were going to ride it further than last time, but time was getting late. I rode an area that I had not ridden yet. We will be taking our bikes to Rapid with us each time......very fun!
We found some good deals, at Pawn Stores, on Wii items too. I did not know they had the controllers in Turquoise and Pink, two different Pawn Store, bought them both. We got five games, and a riffle holder thing for the Cabela's game. Man we had fun!
We are talking about riding our bikes on the prairie today. We have seen a pile of fossils that have popped up on the road. One is like a tube, so it looks from the vehicle. We are going to ride out and see what is there...and they are a good ways out.
Man. For less RAIN here! We have NOT gone to Church, being out stuck here, more than we HAVE gone to Church in 2014! Dang This Weather! We have another Backpacking Trip planned as well as a trip to Mendora, ND to ride the Maah Daah Hey Bike Trails. It looks VERY fun! (google photos here) I might not be going very far or very fast (right now) but man! I almost forgot how much I love riding a bike!
Weight Loss? I don't know. I should get on the scale. But man. I am stronger and feel so much better and am really having a good time!
July 1, 2014 ~ Fossil Hunting 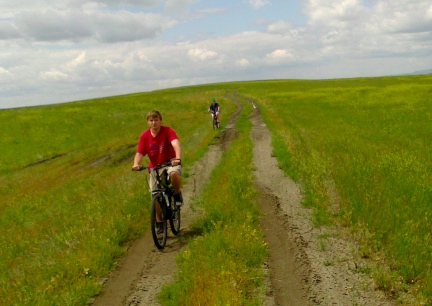 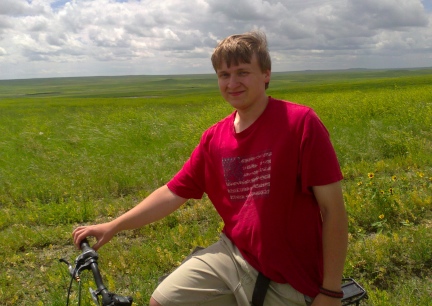 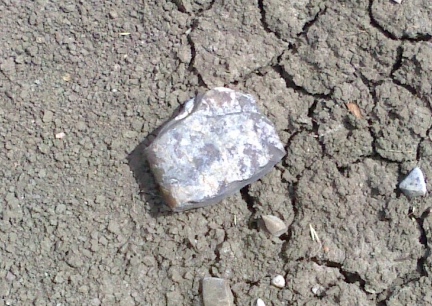 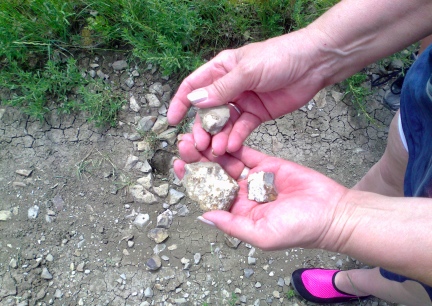 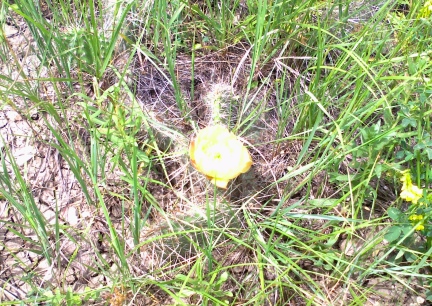 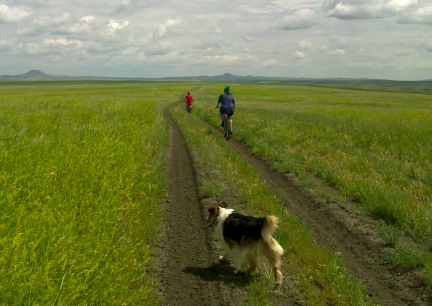 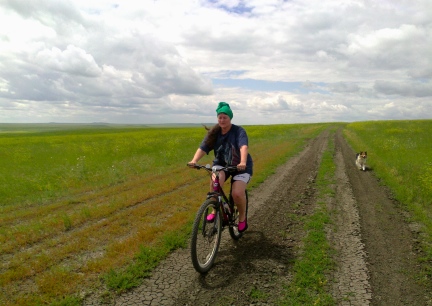 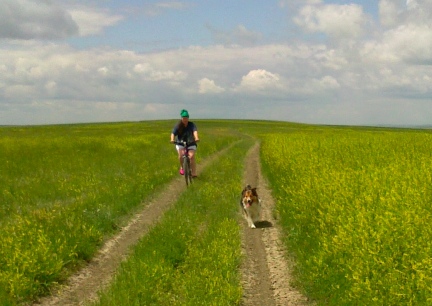
Today Deron, Blake and I rode our bikes ON GUMBO SOIL to the pasture gate, the round trip was 5.3 miles. I walked a lot more than I wanted to, but I rode most of it. It is hilly and on gumbo, it is like going 10 miles or more on pavement.
Bike Shorts matter. In jeans my legs are bound and when sweaty it gets worse. I struggled (Sunday) to move the jeans while peddling. With the Bike Shorts I have more freedom of movement, and the padding! Seriously, I just ordered another pair. Not only do they help when riding, you do not have to worry about your pants leg getting into the chain area or caught on a peddle as you ride. I made elastic bands for the bottom of my jeans....but hope to be wearing Bike Shorts now when I ride.
Today's ride was fun and we found a bunch of gooooood fossils! Deron carried both the Bike Bag and the Fossil Digging Backpack. On the way home, he had more weight to carry. I was so Thankful he offered to carry it all on his bike.
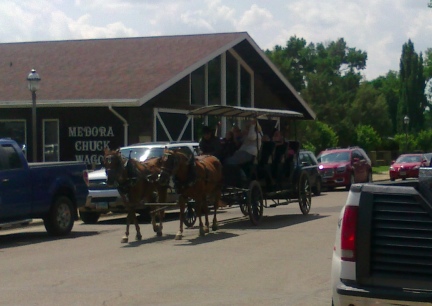
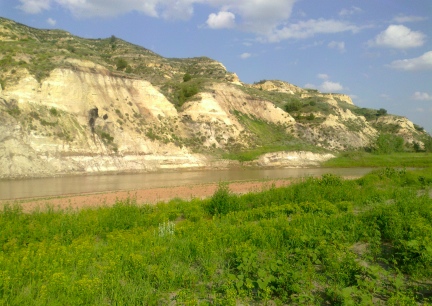
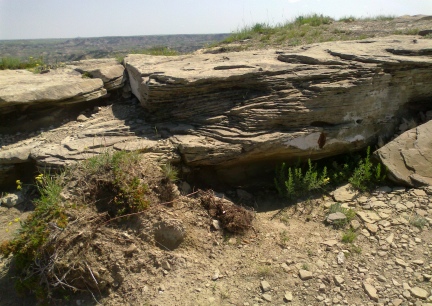
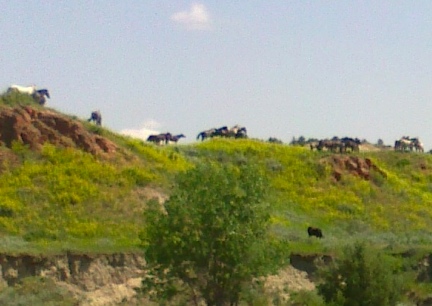
July 2nd & 3rd Maah Daah Hey Trail, Mendora ND photos below
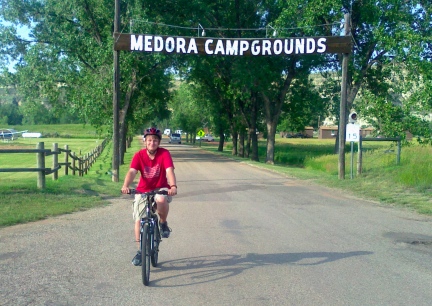
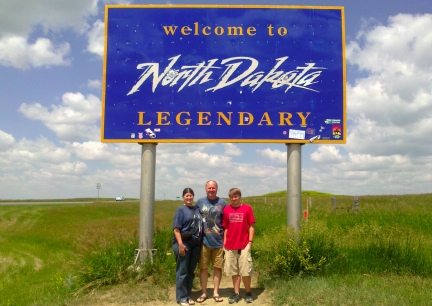
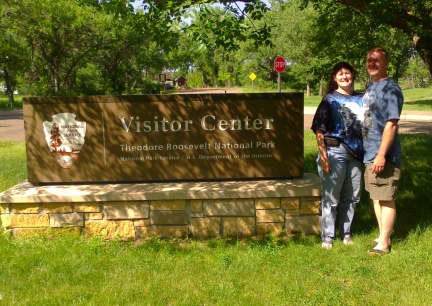
Deron, Blake and I went up to Mendora, ND, I wanted Blake Dakota Kazmaier to see both Dakotas. I had read about the Maah Daah Hey Trail and thought we should go and give it a whirl on our bicycles.
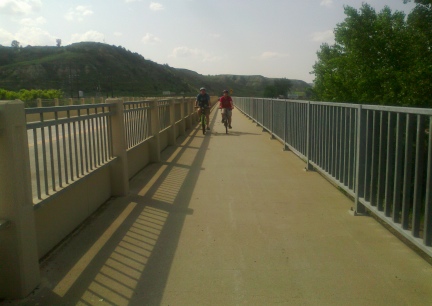
Mendora was a very tiny, nothing but, tourist town. But we could ride our bicycles easy from the Camp Site to the Town and we did a few times. Mendora is a tiny town located just below the Theodore Roosevelt National Park in North Dakota. We ended up riding just under 5 miles around town.
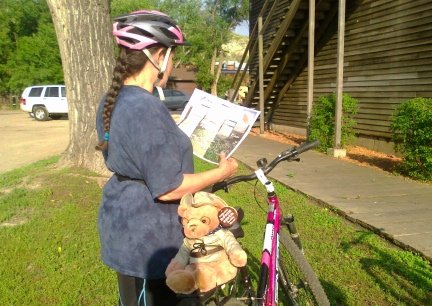
Because we had finished looking around town and it was still early, we drove up to ride the Maah Daah Hey Trail. There was many horse folks there, some riding, some in the nice horse stall and horse friendly camp, and some with horses in their trailers.
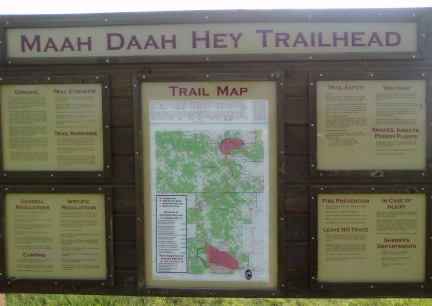
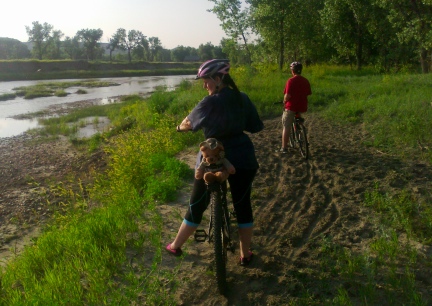
We paid our fee and unloaded the bikes and got them ready to ride. We walked up to the Trail Head and looked at the map and the trail.....Trail? It was about a 6", maybe 8" path that was not very kept up around it. But ok.... We "saddled up" and started riding the not so easy trail. In fact, we kinda took the 'high road' over the grassy area at the start. It alone was hard going. When we hit the trail, not bad, then we went through the first gate and down to the River....the sand is fine and white and about 7" deep. That was not all, as we got closer to the River Drop Offs, the trail was about 12" from it and no where to go on the other side, grown up weeds and down fallen trees everywhere, including on the trail.
In my 40's I rode trails like this and enjoyed them. Now? Not so much. I have to say that even Blake and Deron were ready to turn around when the trail became a mystery as to where to turn into the woods..... we did turn around and ended up not even riding the Maah Daah Hey Trail even 1 miles.
The Maah Daah Hey Trail....BEAUTIFUL! But made for the experienced, rock hard body, not the end of the day riders, but fresh riders on Mountain Bicycles.
           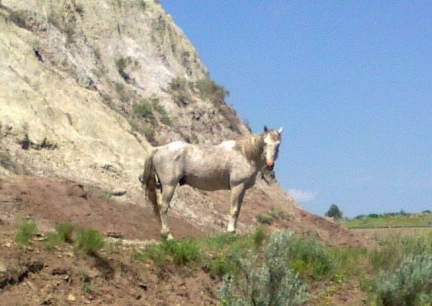
July 7, 2014 ~ Making the Hard Sided Panniers for our Bikes for Camping/Touring 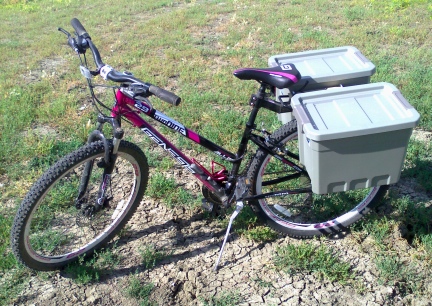
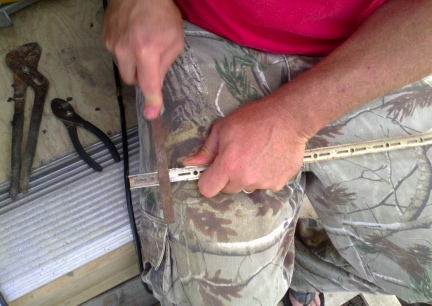
This morning I gathered up all the parts for the Hard Sided Panniers for our Bicycle. I also sewed patches on my new Daybag. Then I made the Striker/Compass/Flashlight/Can Opener/Whistle Keychain for my New Day Bag....we are getting ready for Mickelson Trail Trips as well as a trip to Yellowstone, taking our bikes with us when we go.
For information and instructions on making these Hard Sided Panniers, go to www.faroutliving.com on the 'Make Your Own Bicycle Pannier' page. I have all sorts of Bike Bags and Pannier Ideas and Patterns and Information, some are projects to do with your kids/children for their bikes.
Note in the photos that no matter what the job is that Deron works on, he always has a lot of "help".
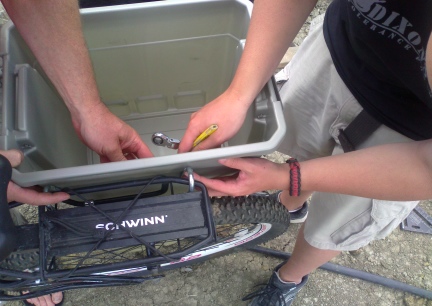 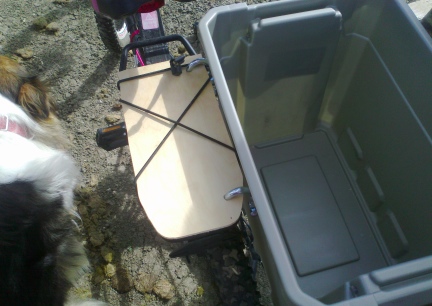 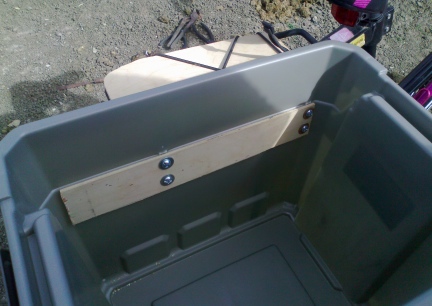  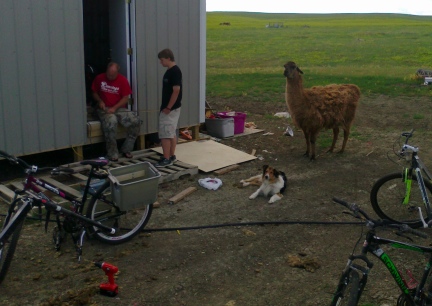 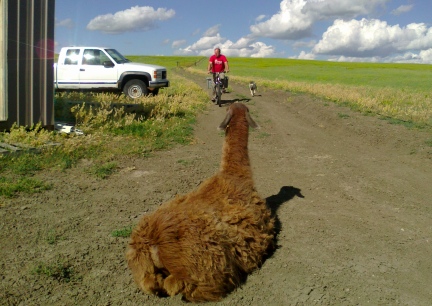
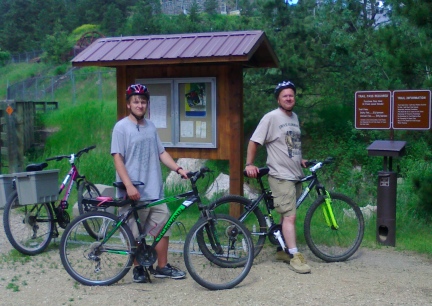
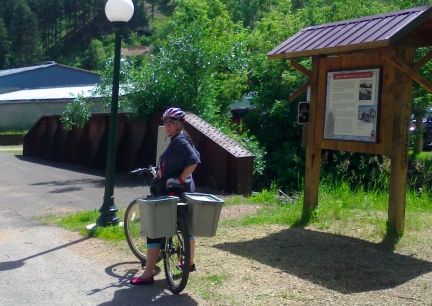
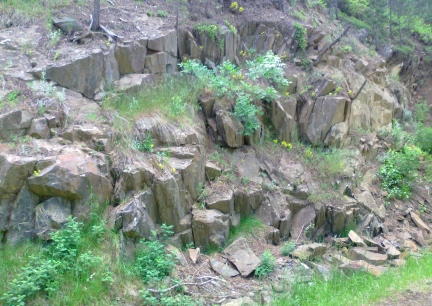
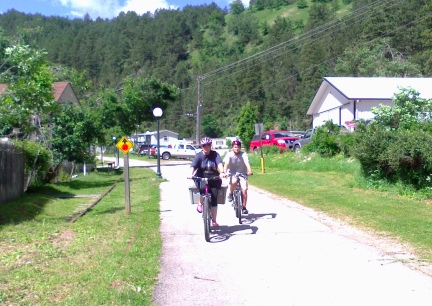
July 8, 2014 First Ride On the Mickelson Trail This morning we got up at 5:30 am and left for Deadwood. We rode the Mickelson Trail from Deadwood to Kirk and back again. I had my new Hard Sided Panniers on with a load in each, not a full load, but going uphill.....
I struggled the first half. REALLY struggled, but slowly and taking many breaks, I made it to Kirk. After a short sit down break, the ride back was fast and fun. The book says that it is 3.5 miles between the two. Blake's Odometer said we rode 7.525 miles.
After the ride we walked up and down the Deadwood Hill, once after Buffet, again, uphill. Shame on me for eating tooooo much! And wearing oversized T-Shrits, only makes me look fatter than I actually am. <sighs>
    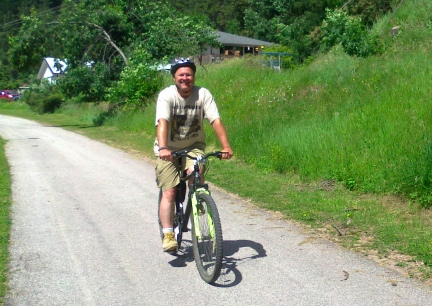 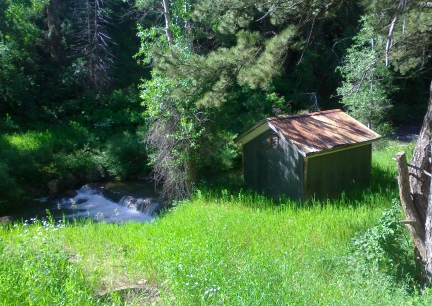 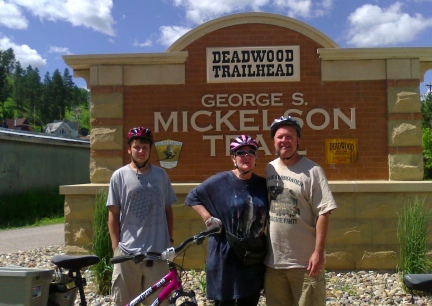
July 9 Short Ride on the Prairie Today we rode just over 2 miles out on the Prairie (where it is hard going and hilly. I am stronger than I was and am so happy to be able to ride better. My legs and body are stronger. In the long run, I love that my body is stronger and better than it was.
July 11, 2014 NO! YOU ARE NOT GOING TO TOW OUR VEHICLE! We got up and took a little trip to Rapid City, SD. Rapid is just over 2 hours from us. We took our bikes, as we have been doing, to ride on the really nice Bike Path, pavement, inside the city there. We usually ride as we shop. We start at one point and have several stores we always visit while in Rapid. Normally, and we have done this several times, we park at First Pawn and Gun, take a Bike Ride from there, and when we get back, go into the Pawn Store and shop.....that is BUY!
So that is just what we did. We parked, got our bikes ready, and headed across the parking lot across the street. I heard someone yelling. I asked Deron if he heard it. We went back. A guy that works at the RAC Rent A Center was trying to tell us that we could not park there and ride bikes. Deron told him that we always do and shop in his store, ask his Manager. I saw his shirt and hollered that we shop at the PAWN STORE. And we left. Thinking no more of it.
When we got back, there was a Tow Truck and people all around. "WHAT THE....????"
It seems that the guy from the RAC called to have our vehicle towed, EVEN THOUGH HE DID ASK THE PAWN STORE IF WE WERE CUSTOMERS AND THEY TOLD HIM YES. Worse. He lied about what we said to him, saying we said, F&$k you to him and rode off. We did not.
We did get back in time and got our vehicle moved before the tow company towed it, and the guy from the tow company was a real jerk to us too. The guy at RAC was again, a jerk, yelling for the Tow Truck to hurry and hook up our vehicle and take it.
Here's the thing:
1. The parking lot had hardly any vehicles in it.
2. THERE WERE NO SIGNS ANYWHERE SAYING A PERSON COULD NOT PARK THERE AND RIDE THE TRAIL.
3. The guy at the Rent A Center was a JERK and he lied, saying that Deron cussed at him and we just rode off.
4. IF YOU ARE GOING TO ADVERTISE YOUR BICYCLE TRAILS IN ALL THE RAPID CITY TOURING ADVERTISEMENT AND PARKING IS A PROBLEM, ADVERTISE THAT TOO.
5. We spend a LOT of money not only at First Pawn and Gun, but all around Rapid City....then store keepers want to tow our vehicle because we ride on the Bicycle Trail????? NOT FIRST PAWN AND GUN, THEY KNEW WHAT WAS GOING ON AND HELPED US OUT OF THE SITUATION. We shop in there store every trip we make to Rapid as buyers.
Now. That said. We did got for a nice ride on the trail. We do not go far or too fast, but we really enjoy the Fishing Ponds, the full clean Creek, the Under Passes, how nice it is all kept, and that there are Bathrooms along the route.
July 17th & 18th 2014 ~ RIDING IN MONTANA AND WYOMING!
My body is stronger, I am loosing weight, and my eyes <?>, yes I said eyes are getting stronger. ie, lesser reading glasses needed again. And most of all, I AM LOVING BEING BACK OUT RIDING A BICYCLE!
I have noticed something weird and wonderful. Not only am I stronger all over and have more balance, but get this!, my eyes are better. Yes. I said eyes. I am 57 y/o and wear reading glasses. First 1.25 then of course moved up to mostly 1.75 for reading, but have used 2.0. For the computer screen I use 1.50. I noticed the other day, reading, my eyes are better and I do not need the 1.75 now. I am using the 1.50 for reading. If I knew where, and yes, I should look, where those 1.25 were, I would try them for the screen. How weird. But, hey! I am thrilled!
We went to Yellowstone and took our bicycles with us. We rode both in MT and WY. Not far, not on some crazy Mountain Bike Trails, but man oh man, I am thrilled we rode.
In Montana, after camping in Livingston, we rode our bikes to breakfast, took the long way there and the long way back. Then we loaded up and headed on for Yellowstone. What an adventure. Yes. We did see bear. Two Black Bears, up close, we were in our vehicle. But we had Black Bear and saw them when we lived in WI. We also saw two Bull Moose, and three herds of Elk. As well as smaller animals.
We spent the night in Teeton National Park and rode our bikes there the next day. Not far, not fast, not on trails, just around the park on the roadway. Tons of fun!
July 24th Out On The Prairie Today was the 3rd day in a row Deron, Blake and I rode our Mt. Bikes out on the Prairie. Gumbo Soil. Betenite. The stuff they make Clumpy Kitty Litter with. Not your usual clay. I call it Dinosaur Poop. Hard going. Somedays when the wind is really high, you can work very hard to go a mile. And we have hills. What I am saying is...a very good work out.
In the Summer of 1997 I rode the Katy Trail end to end with a Church Group, including my middle son who was 18 y/o at the time. Short of altimers, I will always remember that ride. I HAD SUCH A GOOD TIME AND WITH DREW THERE, MORE MEMORABLE! It was a five day trip.
The Katy Trail is very nice to ride, I rode many many miles on it from town to town with friends and family, as well as alone, when I lived in Missouri. I also ran my sled dogs on that trail many many miles, snow and no snow, using an Adult Sized Scooter or Rig or Sacco Cart ~ see www.workinggermanshepherddogs.com
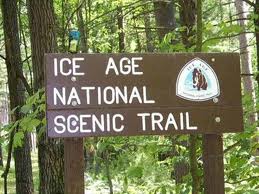
In Wisconsin Deron and I rode the Ice Age Trail. When his two sons were with us for the Summer, we took them on it too. While we did not ride all of this trail, we rode many miles of it.
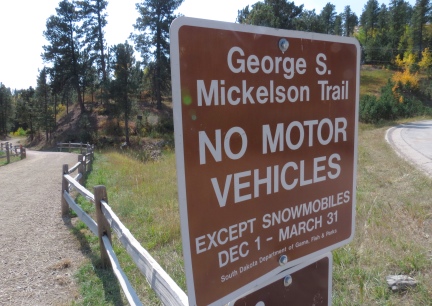
Now we live in NW SD and had started riding the Mickelson Rails to Trails. I so want to ride it end to end with a group.
The Mickelson Trail has quite a lot of elevation changes. The hills from Deadwood to Kirk about wore me out....but I am getting stronger and have more endurance then I did, well, even last week.
So. I continue to ride the Prairie, not just for the good work out and to stay out riding. Riding bikes is so good for the body and soul. But as I ride and as I get winded and want to stop, I think about Mickelson Trail, end to end, and try hard to peddle on.
RECYCLING, TRASH BACKWARDS, REUSING, CUSTOMIZING A USED BICYCLE TRAILER, ONE THAT WAS HEADED FOR THE TRASH/GARBAGE
July 26, 2014 Deron and his son, Blake, Recycle A Bicycle Trailer for Touring 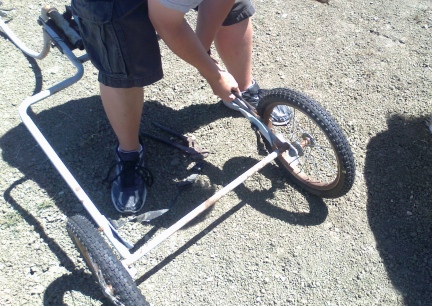
The first thing that had to be done was to take the old, hard plastic child's seat off the Trailer's frame.
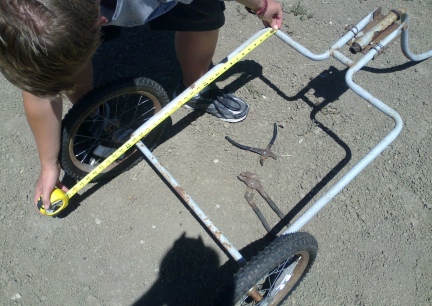
Measuring the Bicycle Trailer to be turned into a Bicycle Trailer for Touring.
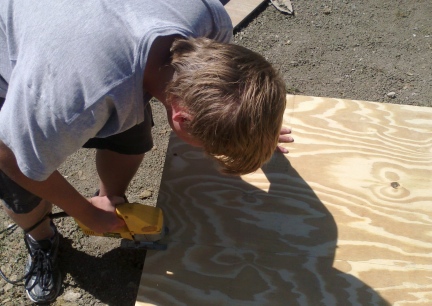
This is Blake cutting the board for the platform to hold the Plastic Storage Tub that will hold Camping Gear being pulled behind the bicycles.
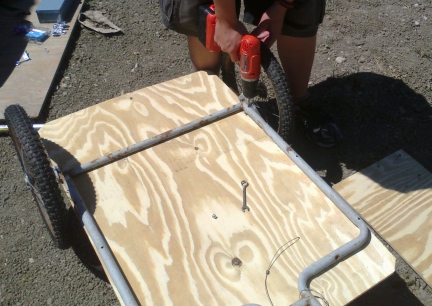
The board had to be drilled, as did the Trailer Frame, so that they can be bolted together.
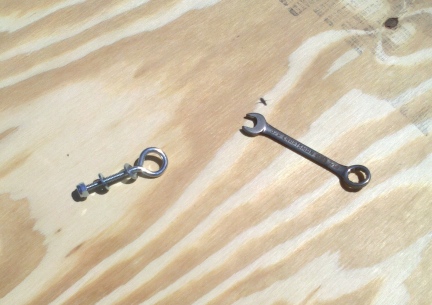
We used eye bolts so that on the top side the O in the bolts can be used for tying down the loads.
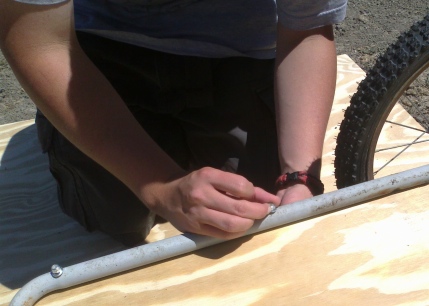
Each bolt needed to be tightened down just right so that it will hold well for the miles, and hold the load down onto the Trailer.
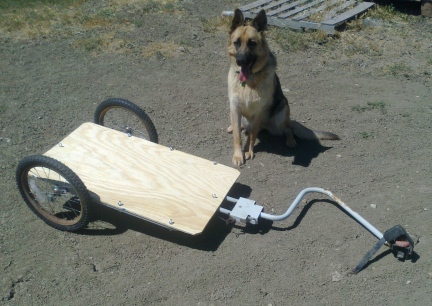
Flipped back over and ready to go. You would have thought Tekoa, our GSD Pup, was the one to build the Trailer.
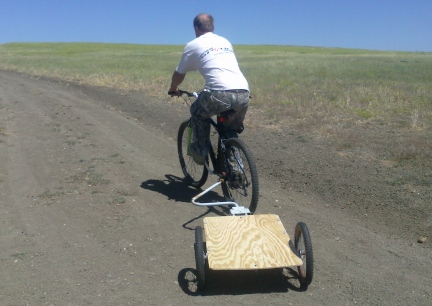
I took this photo a little to early, I should have let the Bicycle Trailer to straighten out behind the bicycle. But here it is, Upgraded and ready to go!
August 5, 2014 The Bicycle Forum 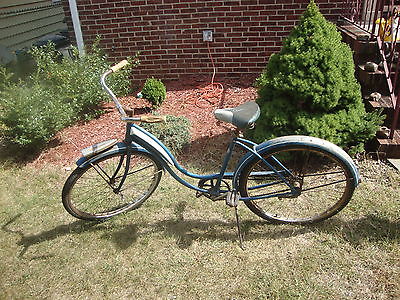
Today on a Bicycle Forum I am on I asked the Question about people's first bicycles. The folks started sending photos of their first bikes. One guy went to the Internet and looked up a photo of the bike he had as a kid. I thought that was a great idea and went and did the same. I picked a photo of a bike much loved/much used, like the one I had. The memories!
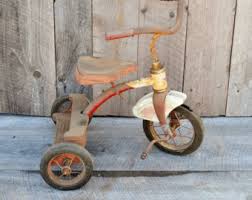
THIS was actually my first, well, one like it, my first RIDE! Oh the miles and time spent on that trike!
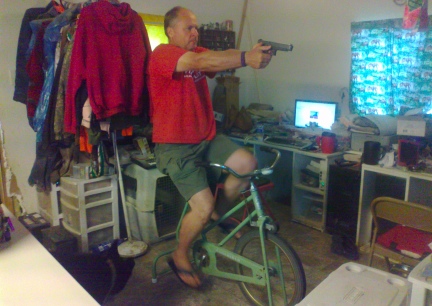
It has been raining, off and on, so I brought in the Stationary, or call it the old Exercise Bike and rode for several minutes. When I was finished I asked Deron if he wanted to ride it, as he sometimes does. It IS a good workout! Deron asked me to hand him his pistol so that he could practice it at the same time. For those of you that do not understand, it is unloaded, and he is dry firing with a snap cap (fake cartridge) in it for muscle memory. We shoot with clubs, competitively.
When you have a tiny home like ours, it does get cluttered. But we love it. It costs very little to heat and cool.
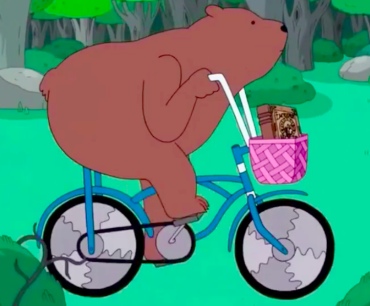 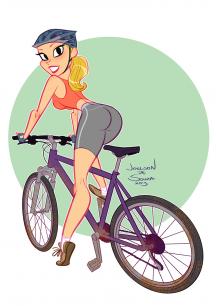
WHAT I LOOK LIKE ON MY BIKE! ~ WHAT I FEEL LIKE ON MY BIKE!
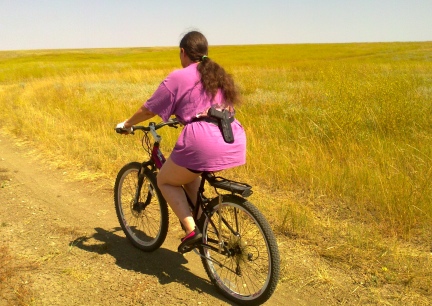 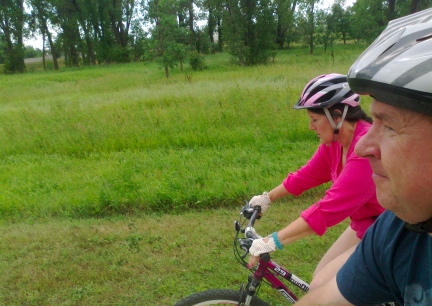
Sunday we rode our bicycles in Belle Fourche, we took a nice ride around town and on the Bike Path.
When I got home I had a note from my son who said that we may well be taking that Katy Trail Ride later this Fall. 12 miles one way, and out and back, for lunch. We used to ride like this all the time....
I will need to up my work out to get ready for this! So, out to the prairie today to ride further than we have been. It was not easy for me, my lungs damaged by Black Mold in WI and now "getting something", but even with walking my bike up two hills and stopping when I had to, we still rode further and I am sooooo glad we did!
RIDING BIKES HERE IN NW SD 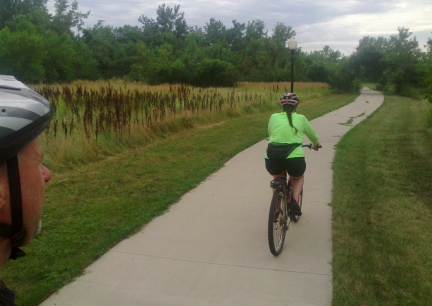
Deron and I have been riding our bikes everyday. We may not go that far, or too fast, but MAN! I am loving it!
Thursday we rode in Belle Fourche. IT WAS HOT!
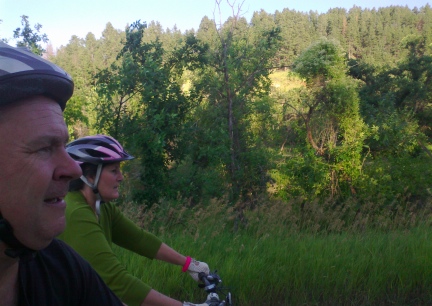 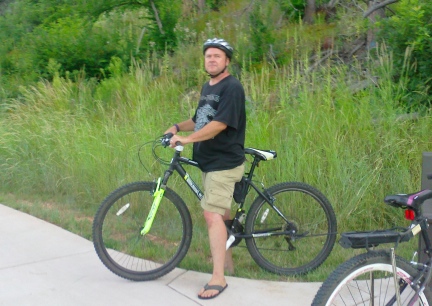
Last night we rode on the Spearfish Canyon Bike Trail.....WOW! WE WILL BE GOING BACK THERE AGAIN AND AGAIN! It is soooo beautiful there. And cooler. The Canyon and the trees make it cooler to ride there.
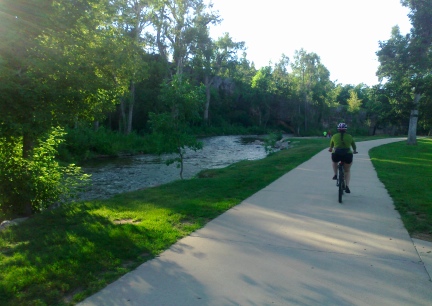 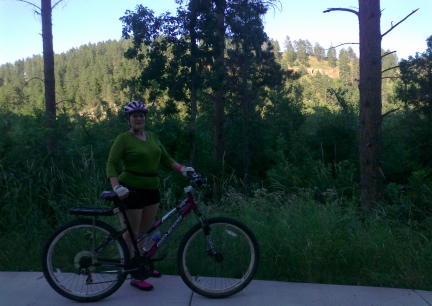
Our bicycles are High End Walmart Bikes. We love them. They are rated to 350 pounds and built tough. IF you are thinking about getting a bike and getting out riding (and am so encouraging you to <smiles>) DO IT NOW! The Summer is quickly coming to a close and Fall is such a lovely time to ride! You can get out in the fresh air, get your Vitamin D, work out/exercise, get better balance and muscle legs for horseback riding, and have such fun doing it!
It is soooo much for fun, and better for us, than the sitting home watching TV we were doing a couple of years ago!
 id=9660 ALIGN=LEFT id=9660 ALIGN=LEFT
STAY IN SHAPE BY USING PEDDLE POWER FOR MORE THAN JUST BICYCLES! HA3
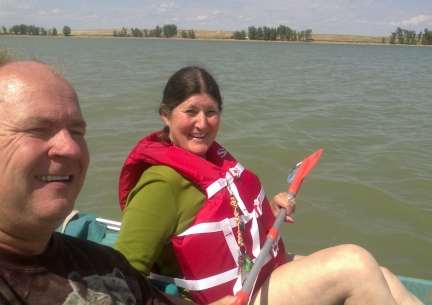
Deron and I bought the Pedal Boat in the this photo 8-16-2014. It was in LIKE NEW shape. We found the Boat ad on Craigslist.
August 16 2014 Pedal Boat On Water! 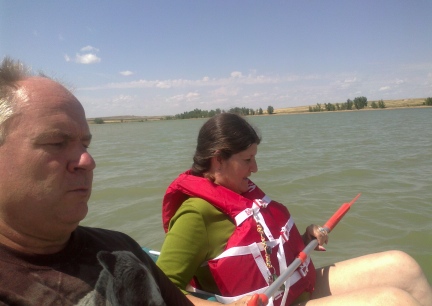
After Church, we took the Pedal Boat down to the Belle Fourche Reservoir
OH! WAS THAT FUN! Even with my hurt foot, I did not have too much trouble peddling it. I was afraid that I would not be able to keep up with Deron on the peddles....actually, Deron kept telling me to NOT peddle too hard, to peddle gently (I just don't do anything "gently" HA3 )
It had rained in the early hours of Sunday Morning. By the time we got to the highway gate, our bikes and boat were FULL of mud! Guess it keeps us humble. <winks> My "Like New" boat sure did not look it then, sitting there a muddy mess. Deron cleaned it up before we got in at the Lake.
After. We have a Water Station in Belle Fourche. .25 for 100 gallons that pour out of a pipe from about 15'. We went by there and Deron put a Quarter in and WHOOOOOOOOSH! the water filled and cleaned the little Pedal Boat. Ha3 Now when we go to town with a muddy, dirt, or dusty, boat, guess what we will do first.
Have a good day. Man it is nice here today! I won't be riding my bike out on the prairie (foot), but I will be riding the stationary bike on the porch....wanna keep up my candence for that boat and time on the trail on my bike!
Better Not Ride Today 2014-08-23 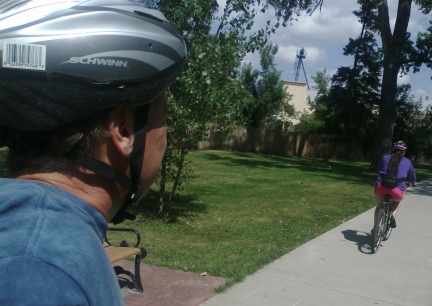 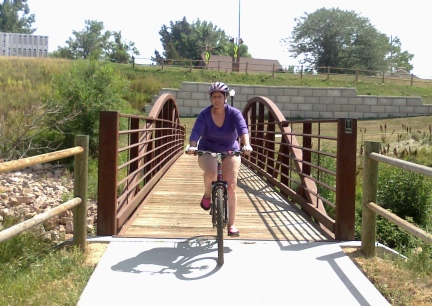
Deron and I have been riding bikes everyday. Everyday. On Friday the 22nd, we rode in Belle Fourche to the Pizza Hut, and I choose my food wisely. It was further than we have been riding. It was a really fun ride, even though it was in the 90's (degrees) when we went. Any days I can not get out and ride I have been riding the Stationary Bike.
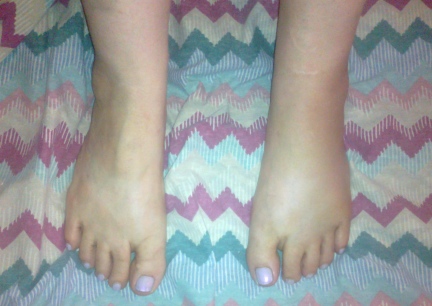 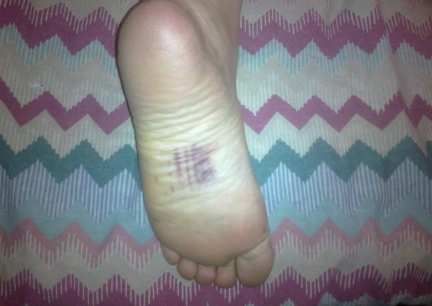
However, today we (I) should probably not ride bikes. One August 16th, and not long after we just bought a Pedal Boat, I fell in a stupid, not even sure how it happened, bicycle accident. I was not even moving. I was getting on the bike. My left foot was on the pedal, my right foot was going onto the pedal to get the bike going, and over the bike went to the left. My left foot folding in half under me. I am bruised, foot, legs, butt..... Dang It.
The problem is, a week later, it is not much better. I think maybe I should continue to keep it up/elevated, and not ride.....we shall see. I hate not to at least ride a little on the Stationary Bike.
MICKELSON TRAIL AUGUST 30, 2014 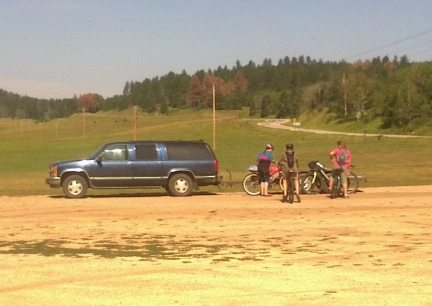 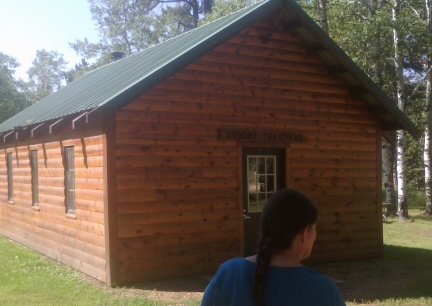 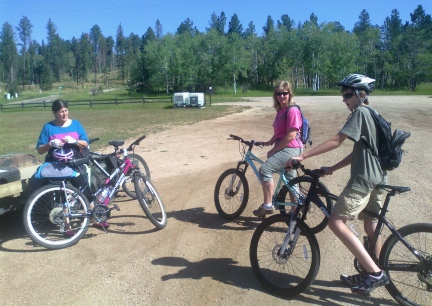 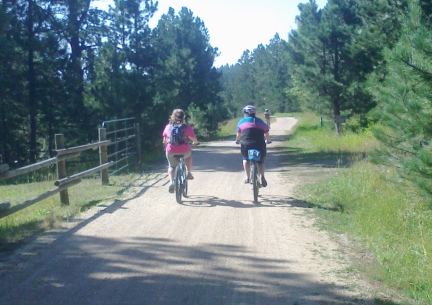 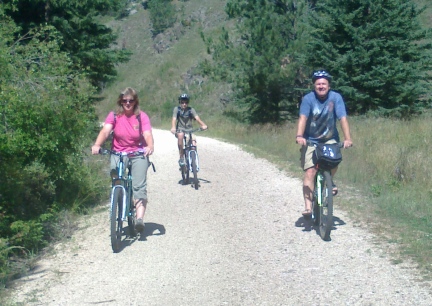 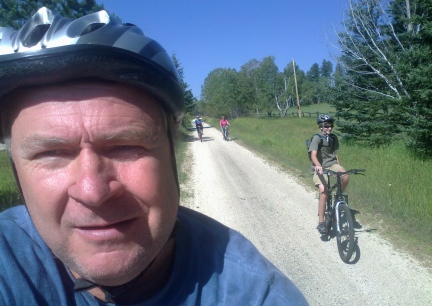 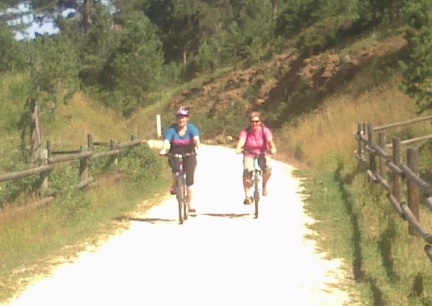 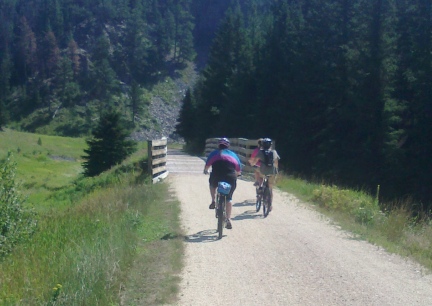 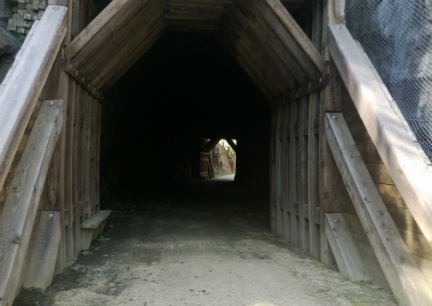 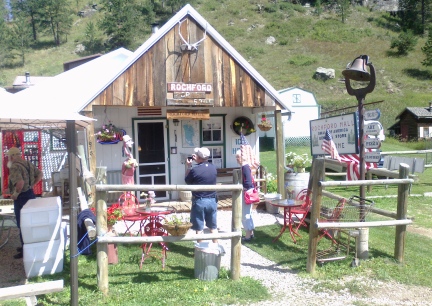
WOWSERS! WHAT FUN!
Deron and I met our good friends, April and her son Tom, at the Dumont Mickelson Trail Trail Head. WHAT A LOVELY DAY FOR A RIDE! We rode to Rochford, just over 10 miles, and then into town, adding to our mileage to, just a tad under, 11 miles.
The weather was so cool; when we started, that I was debating a jacket. The sun was out, but not beating down. There was a breeze, but not so much wind that it takes your breath away and or dries you out as you pedal. The Trail was chat (small packed rock), all but a bit of larger rocks near the Really KOOOOL Tunnel....this is a Rails to Trails Trail. The company was fun. We had a good time riding, visiting, laughing and taking photos along the way.
When we got to Rochford we had lunch at a.... what do you call that. More of a living room with tables than a restaurant/bar. There were musical instruments were set up and I am betting it IS the place to be, in that very small town, on a Saturday Night! "Population 25...depending on the time of year". They also have, what they claim to be, The Smallest Mall in the USA....a small, used to be a house, store with groceries, t-shirts (I bought a Michelson Trail T-Shirt) and other souvenirs. They also serve Ice Cream....no I did not that time, but we are planning more rides there. <smiles>.
April's husband, Tom, picked us up in Rochford, we had lunch together and visited some more. IT WAS WONDERFUL!
I am also excited that I rode the 11 miles without problems. I am so glad to have my endurance up! I can not wait to get back out on the trail and see more of the SD area we have not seen. I am really thankful to have had all the short rides so that I COULD build up and not hold people up on the Trails. My health is better, since we have been out riding again, and MAN! I am loving be back out on a bicycle again!
Man! I have to start writing down the number of miles Deron and I are riding our bikes!
This week, and that includes last Saturday, we have ridden 31 MILES, and we did not ride 3 of those days, weather (stuck here). I ride my Stationary Bike when we do not ride our bikes.
Today we rode 5.558 miles, to Papa John's for Lunch. I did well. I did not over eat. <smiles> I had two slices of our pizza with water and Gator Aid.
My new Camel Back and Scale should be here Tuesday! I really got dry again today riding. I really did have to stop just because my throat was so dry again! Yes. I DO stay hydrated.
September 10, 2014 New Equipment 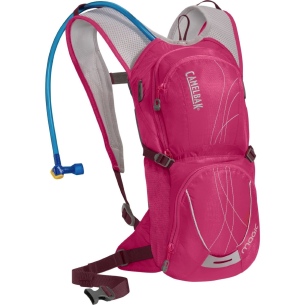 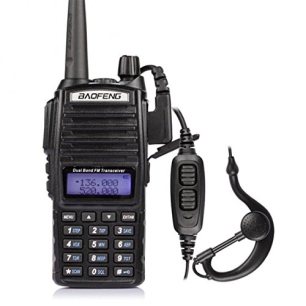
Deron bought these items for us. He found a PINK Camelbak for me, I have been getting so dry as we ride further. I/We hope this will help me be able to continue on more miles as we ride.
The Walkie Talkie Radios are really KOOOOOL. Deron programmed them for us. We will be able to talk to one another, note the clip on mouth piece. The Radios also will be able to contact the HAM Radio, Emergency Radio as well as NOA Radio. Further, these Radios can be set up for groups to have a channel of their own. These radios will be great for any ride, but especially for Bike Camping and Touring as well as for all the areas out here we ride in that DO NOT have Cell Service.
September 18, 2014 (Blake's 19th Birthday) 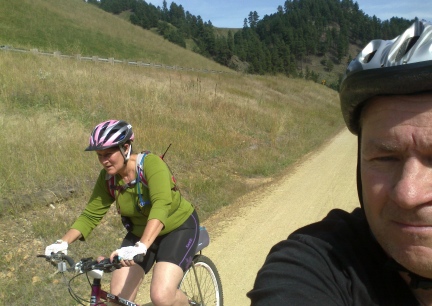 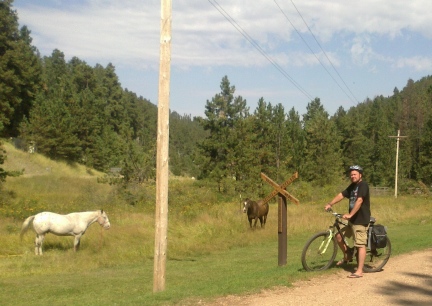 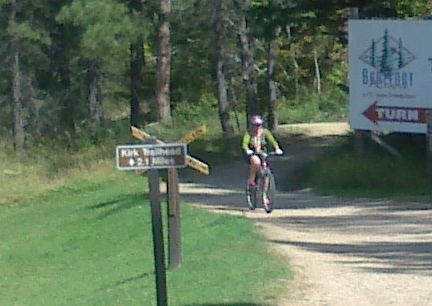 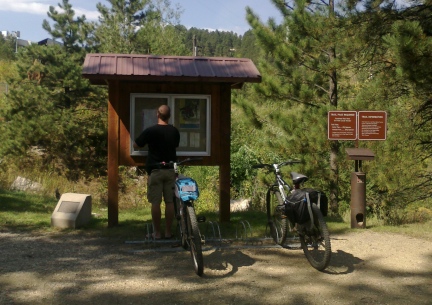
Yesterday Deron and I rode the Mickelson Trail. The plan was to go further than we did, but the uphill was KILLING me. So much so, I have to admit, I had to walk the bike about 1/4 to 1/2 (not all at once, just a little bit once in a while). When I say uphill, I had no idea how much of an uphill til we turned around and went back. I barely pedaled. In fact I used the brakes far more than the pedals. Deron was certainly flying at over 20 MPH on the way back, I was not too far behind him. A VERY GOOD 12 MILE RIDE! Hard work out. (my foot is feeling it all too <sighs>) We rode Deadwood to Sugarloaf and back.
This past week, with 3 days of mud here (could not ride) we rode just over 31 miles, not bad. We rode the prairie today, 5.525, that will start a new weekly tally. My health is so much better since we started riding bicycles again! We even went and test rode FATTIES! (those big framed, big tired bicycles for snow and sand and any other surface). I just don't know if my lungs can handle the cold with riding in the high winds here in the winter.
Deron and I have been riding our bikes almost every single day. It is such a good and fun work out for both of us.
I just got back from a 5.266 mile ride out on the prairie with our Farm Dog, Raya, and one of our GSD pups, Tekoa. Great Ride! I am still sweating! (Deron is working and was unable to join me this morning).
We were gone this week end, stayed over in Raid City, but took our bikes with us and rode them on the Bike Path (pavement) there.
I just added last week's Sept. 15th though the 20th mileage total and..... I have to say I was so pleasantry surprised. 40.621 miles.
You know? I was Old, Fat, Tired, and Lazy. Now? I am just Old and Fat (and loosing). I am tired after a long and or hard ride, but not tired and lazy all the time any more. I sleep better at night and I make better food choices. For me, riding a bicycle, getting back out there and having fun, is SURELY good for MY health!
Article on a Bicycle Forum I am on... Feds spend $300K on study on how to ride bikes
The National Science Foundation has paid $300,000 for a study on how “humans interact with bicycles,” which a House committee is calling “wasted” taxpayer money, according to The Washington Free Beacon.
The premise for the project , conducted from October 2009 to June 2013, was that bicycle dynamics are “poorly understood,” and researchers set out to come up with new designs to encourage more Americans to bike to lower their carbon footprint.
“Although human-operator control models exist for numerous aircraft and other vehicles, the bicycle with a rider is a human-vehicle system whose dynamic behavior is poorly understood,” researchers at the University of California, Davis, which received the NSF grant money for the project, said in a paper publishing their interim results.
Texas GOP Rep. Lamar Smith, chairman of the Science, Space, and Technology Committee, said the study was unnecessary when considering the bicycle industry is nearing $65 billion a year and puts huge financial resources into research.
“The NSF has gone off the road, and taxpayers are paying for it,” he said. “Scarce public funds were awarded for an ill-conceived study to improve bicycle designs. Peddling their proposal, the researchers asserted that bicycle riding dynamics are ‘poorly understood.’ Yet bicycling invests … hundreds of millions in research and development. … What’s really poorly understood is why the NSF wasted $300,000 of taxpayer money on this project.”
http://www.foxnews.com/politics/2014/09/28/feds-spend-300k-on-study-on-how-to-ride-bikes/
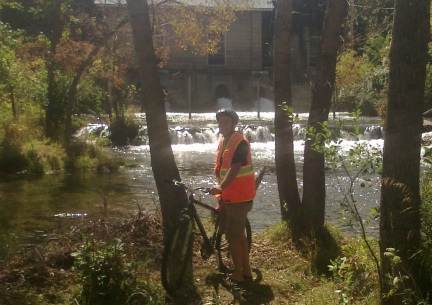 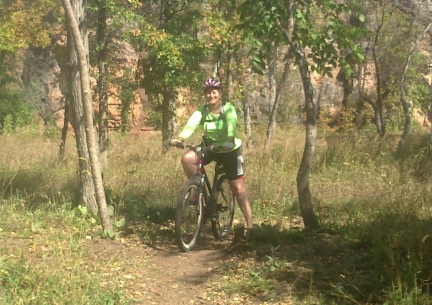 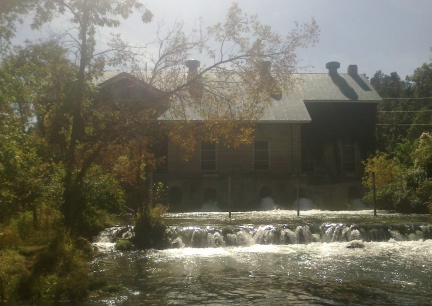
WE RODE TO LUCKY 13'S for lunch AND BACK! Deron and I rode UPHILL to lunch, then rode/flew back down to the Park where we parked our vehicle. What a great ride! Warm, but not as hot as the two days before. 8.367 miles.
Later we rode almost 3 miles Test Riding bikes. I rode a TREK Sky S, I liked it a lot, 29" wheel, I am used to that. Deron rode a TREK Fatty, (just the bike they put him on because they knew I want a Fatty) I can't remember the Model Name, but a $4999.99 bike, on sale $4599.99. We switched out bikes on the test ride so that we could try each. I liked them both. Really though, I lean toward the Salsa Mukluk. Deron says I should get another Mountain Bike, he is right for the riding we do. (pavement, prairie and Mickelson Trail). That one, or two that I have Test Rode, were not nearly as expensive as the Fatty! But when that snow comes, I know I will want a Fatty Bike! Ha3
This weeks mileage ~ 42.805
On the way home we were almost shocked to find an Elk in a pastor about 9 miles from the turn off the highway we take to come home. Lovely big Bull with a huge Rack!
October 2014 Ordered Gravity Bullseye Monster and Found a Reveiw Thread on a Forum I am on... I thought this was very encouraging to me and those that are trying to ride a bike to loose weight and to get healthy....
This was very encouraging to me and thought you all might be interested..... with permission to repost:
Excellent Choice!
Marna: You have made an excellent choice! I own one in matte black and have nearly 500 miles on it. I too am overweight, 262 lbs on a 6'1" med frame. Since I returned to cycling I have lost 46 pounds. Also My heart has become more functional. I am a congestive heart failure patient with diabetes type 2 and arthritis in my arms and knees. But cycling has helped with conditions too. So when you ride, ride for the pure enjoyment of it. You'll discover that the scenery is prettier and that you'll discover things you have never seen before. Old Bear52
Have Monster, will travel.
I just spent three hours with a good friend from Kuwait who is graduating in December, He is getting a bullseye monster in silver after he got to ride mine around a lake near his apartment. Then he tells me that in November he is giving us his car, a 2004 Crown Victoria. He doesn't want to ship it home and wants us to have it because he doesn't want to ship it home. He says near his home theres lots of beach and sand dune riding he wants to do and his current Mtn bike just won't cut it.
And so this brings me to the point of this post. Oldbear and his wife, Sue are going to take some trips that we haven't been able to do for about 15 years. First is Sedona in early April. We want to spend a week there and soak up some desert sun and warm our bones from the Midwest winter. Of course the Monster will be going with to get some sand and redrock dust on it. Next in May, we plan on attending the Dirt Fest in Pennsylvania. I hope that registration open soon so we can reserve a houseboat for my wife, son and I. I am personally looking forward to riding some of the excellent trails around the area and attending the bike expo and some skills clinics. then for the last week in September and first week ion October we plan on heading west again to out personal mtn biking Mecca, Moab #
Utah. It's almost 20 years since we have been there and we want to look fir a house or manufactured home to but so we can 'retire"' out there. If not in Moab proper maybe out in the area near Lasalle.
Plus if the VA gets it act together and gives me my disability, I hope to own a Gravity full suspension fat bike.
Soooo if you attend the Dirt Fest, and see a
gray bearded old fart on a well used black Gravity Bullseye Monster wearing a florescent green shirt and plaid baggies.
It's most likely me!
(of course Moab should be on almost everyone's bucket list)
the Oldbear Fred Peace
Dear Marna_Kazmaier,
oldbear52 has just replied to a thread you have subscribed to entitled - Gravity Bullseye Monster - in the Fat Bikes forum of Forums - Mtbr.com.
This thread is located at:
http://forums.mtbr.com/fat-bikes/gravity-bullseye-monster-920263-new-post.html
Here is the message that has just been posted:
***************
:thumbsup:Marna: I am not that computer savy to repost It. I will keep on writing and posting here if you see something you can print it out and put it on your blog and yahoo. com page. It's kinda hard when they only thing this laptop does is act as a portal to the web.
On the bike front we are going to order a Gravity Bullseye monster for my oldest son who has autism. He can ride a bike and deserves one of these for himself. We are ordering in March cuz we gotta save for it. It will be a green 16 inch. He's currently riding a walgoose beat and keeps wanting me to lower the seat on mine to ride it :cool: Then the next bike is for my wife next fall after her surgery to remove a tumor. :thumbsup::thumbsup: Your Humble Obedient Servant, OldBear
***************
WINTER BICYCLE RIDING GEAR This was my reply to someone that asked about what to wear when riding a bicycle in the Winter:
Winter Gear? Ha3 Yesterday I found out, it was cold here when I left for my ride, that I should leave COLD. I did not think I did, but I had too much on. I did wear a bandana over my face (think Train Robber) for a scarf. It is too warm yet for the Bright Yellow Balaclava, Velcro Scarf and Head Band I made with thick fleece doubled.
Scarves are necessary, you don't want the cold air in your lungs as you work pedaling. People die every year for that reason shoveling snow. But you do not want your scarf dangling either. I cut my fleece scarf to size then added Velcro for the full length/that is the full width, to close it. I had made these for horse back riding too. The work great.
Use BRIGHT Colors. People driving will be snow blind or have coats and such around them in their vehicles. Stay as visible as you possibly can.
MY NEW FATTY BICYCLE ~ WE BOUGHT A NEON GREEN GRAVITY BULLSEYE MONSTER 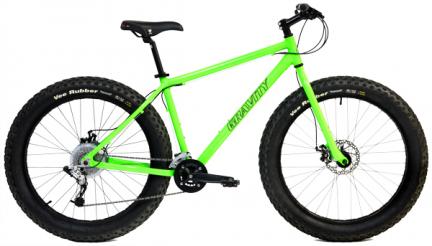
After much discussion, several days of on line research and a lot of test rides on other Fatties Brands and Types riding on the Big Fatty Bicycles, we decided to buy the Gravity Bullseye Monster. Why?
I really wanted the Fatty for Snow and other riding, I have to admit, I am smitten by the look! And they are just fun to ride. However, we are riding Walmart Bikes now, our Genesis, that we love, but are going to need to upgrade. So buying a Dolomite just did not seem like a great idea. But I will say I read a LOT of good things about them on line.
I am older and weigh more than I should and I have lung issues (that are getting so much better with eating correctly and working out and riding a bicycle every day). So I was not sure I wanted to spend over $1500 on a bike that I did not know how much I would actually ride (on the snow).
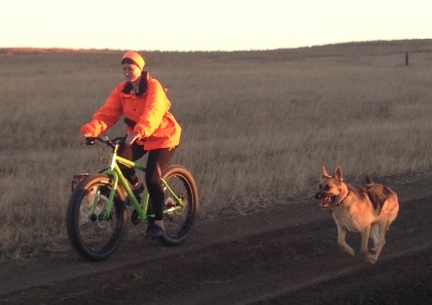 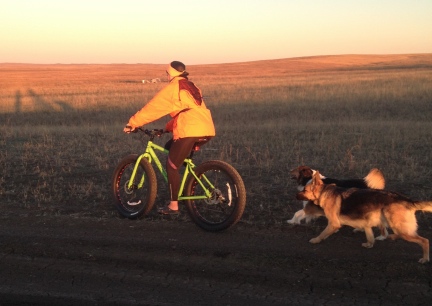
So I researched the on line bicycles and decided, since it has great reviews, to buy the mid priced, Granivty Bullseye Monster. We preordered so it took a while to arrive....we knew it would, it was just hard to wait. I am like a kid at Christmas!
When the bike arrived, I was not disappointed. I LOVE THE COLOR! Love it! The bike seems well built and I was pleasantly surprised to see that the Front Fork has holes for "Anything Bags" on each side for BikePacking.
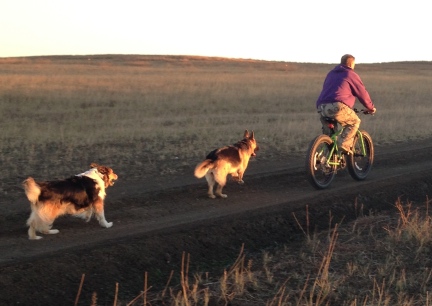 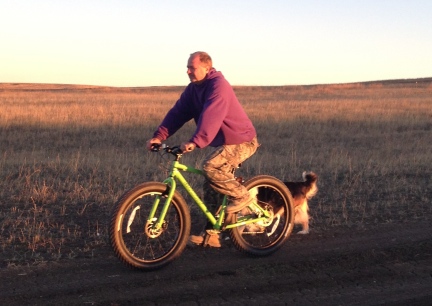
The bike arrived on Wednesday 10-29-2014 in a box and it needed to be built. Not from pieces, but parts put together. It took just over an hour and is nicely made. When the bike was together and ready to ride it was already very dark here and a ride was out of the question. Deron offered to hold a light, but out here, our closest neighbor is 9 miles away, and there are no lights, none.
So these photos were taken, just after the sun came up on Thursday 10-30-2014. We had company coming so we only took a very short ride. You can see two of our dogs, Raya, the English Shepherd Dog and Tekoa, one of our German Shepherd Dogs, were very excited to run with us.
Trip To St. Louis, MO To See My Kids
We went to visit my sons and their families in St. Louis, MO. We left on Jan. 15, 2015. Our Fuel Pump went out on the way there in Council Bluffs IA. We were very Blessed to have found someone who "got it in" right away the next morning. We did loose 3/4 of a day's travel, but while they worked on the Suburban, we unloaded the bicycles and rode over to Bass Pro Shop then stopped and had lunch at BK. It was a lovely day, they have a nice Bike Path in Council Bluffs, IA, and really, it was fun! When life takes one type of wheels, pull out the other.....
We both rode with two of my sons, their wives and one grandchild. I LOVED IT! Something I have been wanting to do since we started riding our bikes again. <smiles>
On Jan 19, 2015 I got the opportunity to ride with my oldest son, Tony, and took it! His son actually started the ride with us, but took a tumble and limped back home. We did go on since Eli was not hurt to badly. There were lots of hills so I did not have much breath to visit as we rode, but a great ride all the same.
Deron and I rode in Belle Fourche Jan 23, after getting home. So we were blessed to ride in three States in a week.
I have been getting a few miles in. The weather has been nice. We hit a little bit of ice while riding in Belle on the roadways, and a LOT (kinda scarey with Deron's Mt. Bike Tires so thin <winks>) under the Bridge.
EDGEMONT TO MINNEKAHTA
June 7, 2016
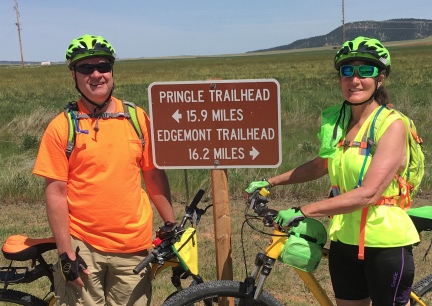 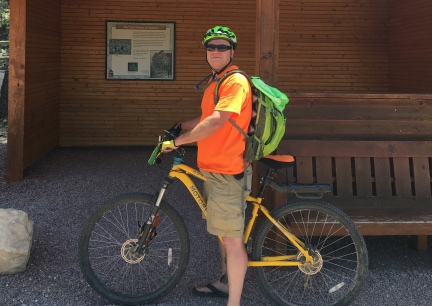
Deron and I did another section of the Mickelson Trail yesterday from Edgemont to Minnekahta and back. What an adventure! My odometer read 33.528 when we got back to our vehicle.
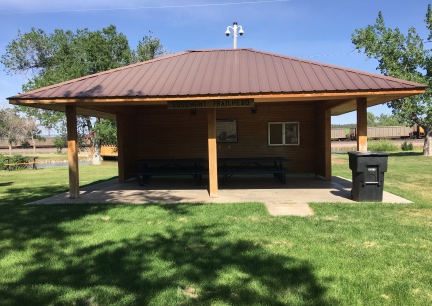 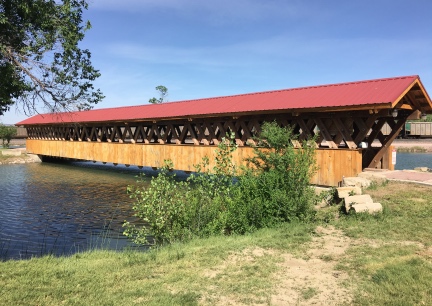
The Edgemont Trail Head is a nice looking park. Small, call it tiny town, but friendly folks with a couple of Cafes, Pancakes for Breakfast in town for $5 on Saturday Mornings, and a few other stores and shops. There is also a Musuem right next to the Park/Trailhead.
The weather was nice, sunny on the trail, and out there, not like in the Mountains, not as cool, or shady. But worked out well. We wanted to ride this section BEFORE the Summer Heat.
We drove to the other end and rode Edgemont to Minnekahta. It is 16.2 miles one direction ride and riding it the way we did, we rode UP HILL first.
Before we even got there, on the way, we saw Elk, a herd of (fenced) Buffalo. We saw many Cotton Tail Rabbits on the trail as well as Many Cattle, a big Yellow Cat, and a full field full of Prairie Dogs that "barked" at us as we rode by them.
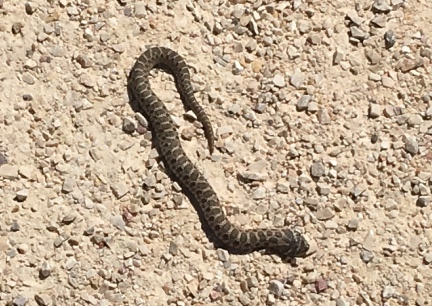
This Bull Snake, I first thought was a Rattler, as my bike went between it, kinda steering over it, one wheel on one side of it, the other wheel on the other side of it (best way to get bit, ey?).....the snake was on the trail.
I only had trouble with the hill up because the day before, Sunday, we fenced all day. I carry a good sized backpack, that is not light, it is loaded, to the top, with supplies and filled water bottles in it. So my back was not happy to carry my Camelbak with EXTRA water, and other extras, in it uphill 16.2 miles, on a bicycle. <grins> I also had a side cramp.....but after eating at the 1/2 way point and riding DOWN Hill back.....what a lovely ride!
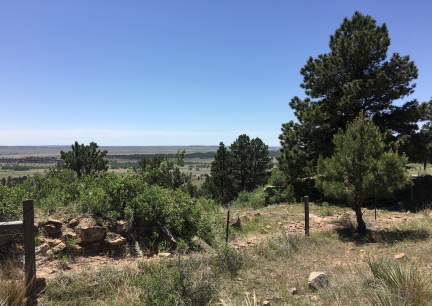 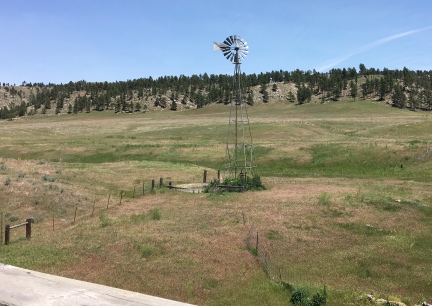
That area is so lovely, and can only be seen on the trail. Parts of it reminded me of the Katy Trail, including the type of chat they used on it in a few areas there.
Lots of animals again, domestic and wild. Lots to see and smell. Not as many bridges, but one was very large and KOOOOOL and long, and very HIGH in the air. But the scenery from there, a wonder!
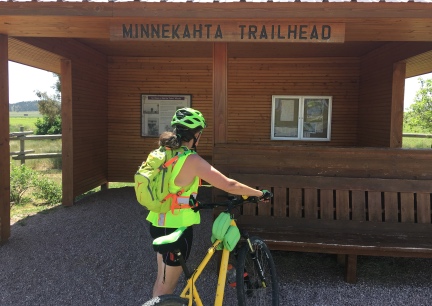 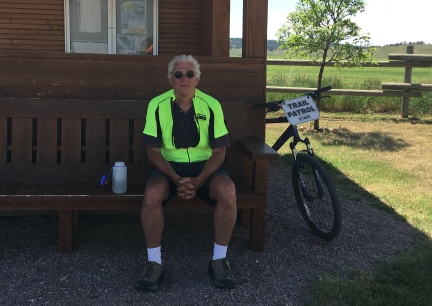
When we stopped in Minnekahta, after we finished lunch, a rider came in - he is the Trail Patrol. What a nice guy! We sat and talked to him for a short time then we were off..... and I thought, I wished I would have taken his photo for my blog.... so we rode back and asked if we could. If you are out on the Trail and a Patrolperson asks for your Trail Pass, remember, THAT Trail Pass helps keep the trail system taken care of, construction, up keep and such. We asked the Patrolman to take our photo....WAY!, better than the selfies we usually take.
They were doing some construction on the trail and rock was really piled high. You had to ride to the side of it and I almost lost it twice, there and back, in that swoshy area.
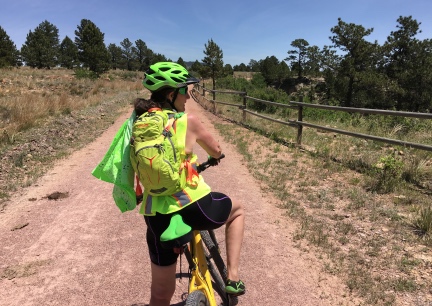
All in all. Our longest ride yet....that is, since starting to ride our bicycle again like we are now, not ever, we have each ridden further in the past; and maybe we will not top it (let me rest a couple days, put in some shorter rides, then talk about it). <winks> 33.528 Miles. Yes. We were beat. And it was a long drive home....
I AM NOW, AS OF TODAY, ONE POUND UP (or is that out from?) FROM MY TOTAL WEIGHT LOSS GOAL! <big grin!> And. Man. We are a whole lot healthier!
Please join us in the Yahoo! Groups called Does My Butt Look Big In The Saddle. This is a fun and encouraging group where we talk about animals, from horses to hamsters, weight loss, and riding bicycles. This group loves to see and send photos to share.
-- The Does My Butt Look Big In The Saddle Team
Wed, 11 Jun 2014 12:32:02 -0400
| 


 In the high plains of South Dakota, USA
 In the high plains of South Dakota, USA